MA Y1 U1: Exploring Aesthetics – Part 1 – Using photos

BACKGROUND

In the ‘developing style’ strand of my practice, I have been exploring how to create ‘transcultural’ images in my art through a process of transcultural layering. I have done some work in this area before starting my MA and I now want to return to it to continue my exploration of transcultural aesthetics as part of my practice.

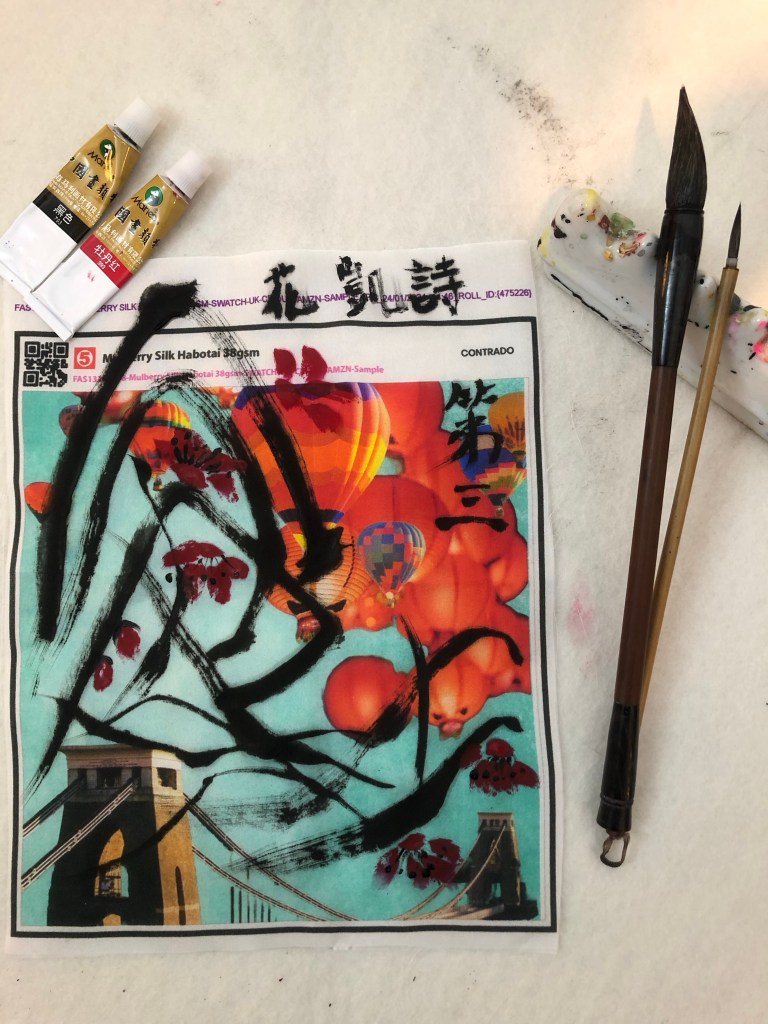
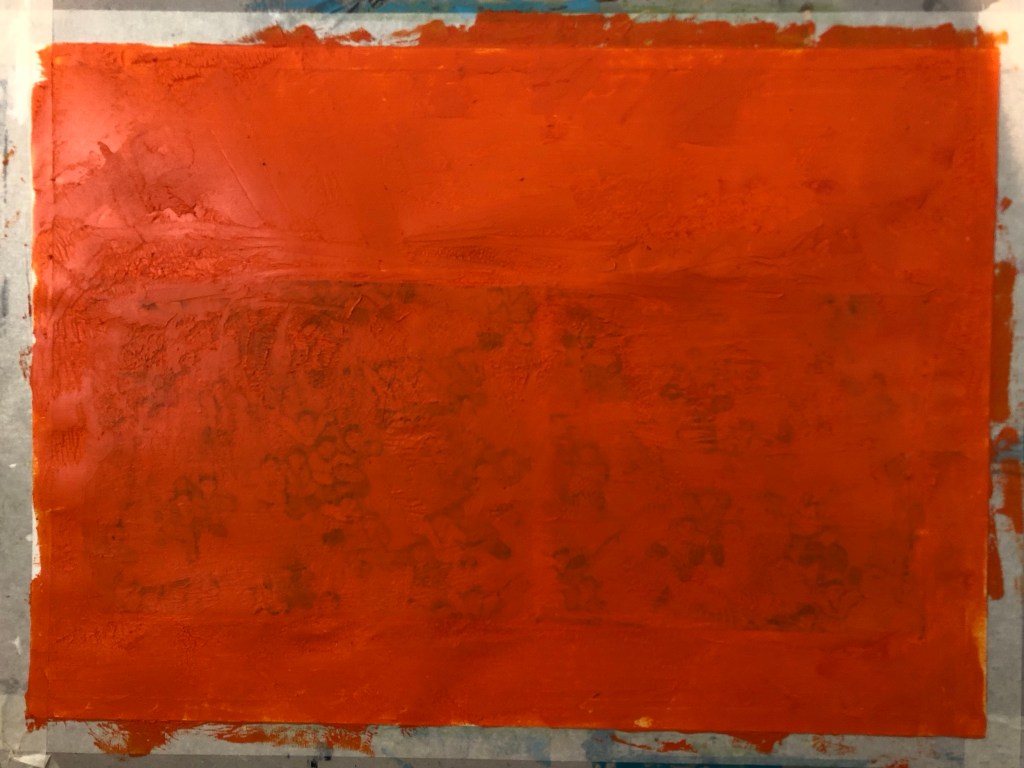
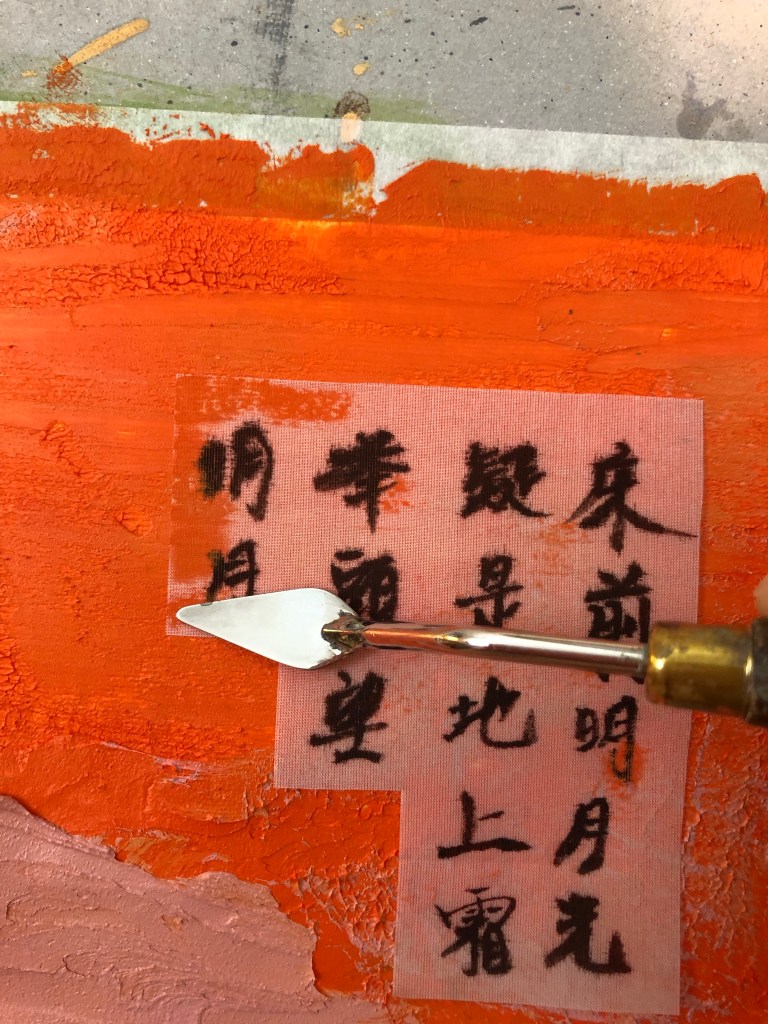
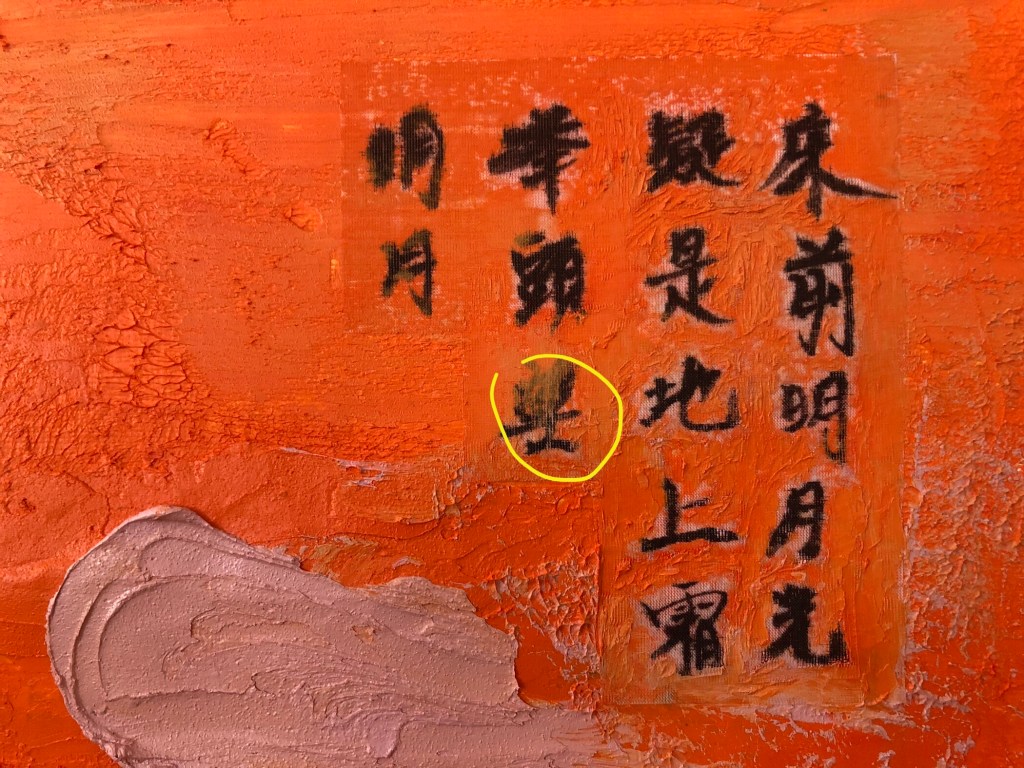
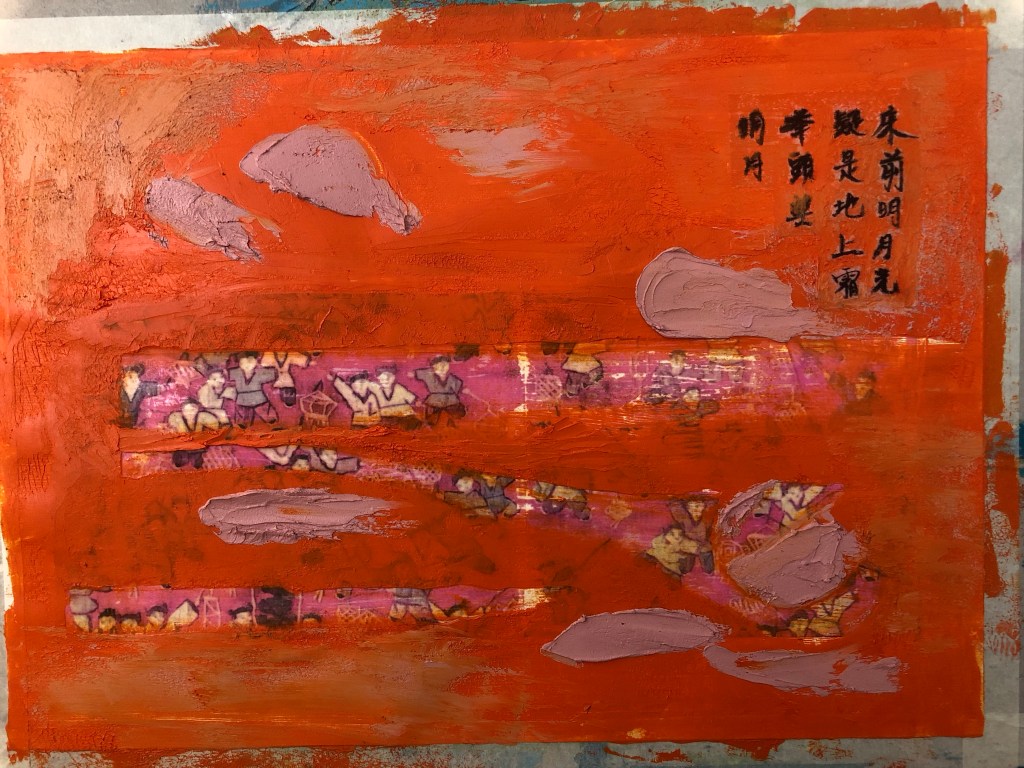
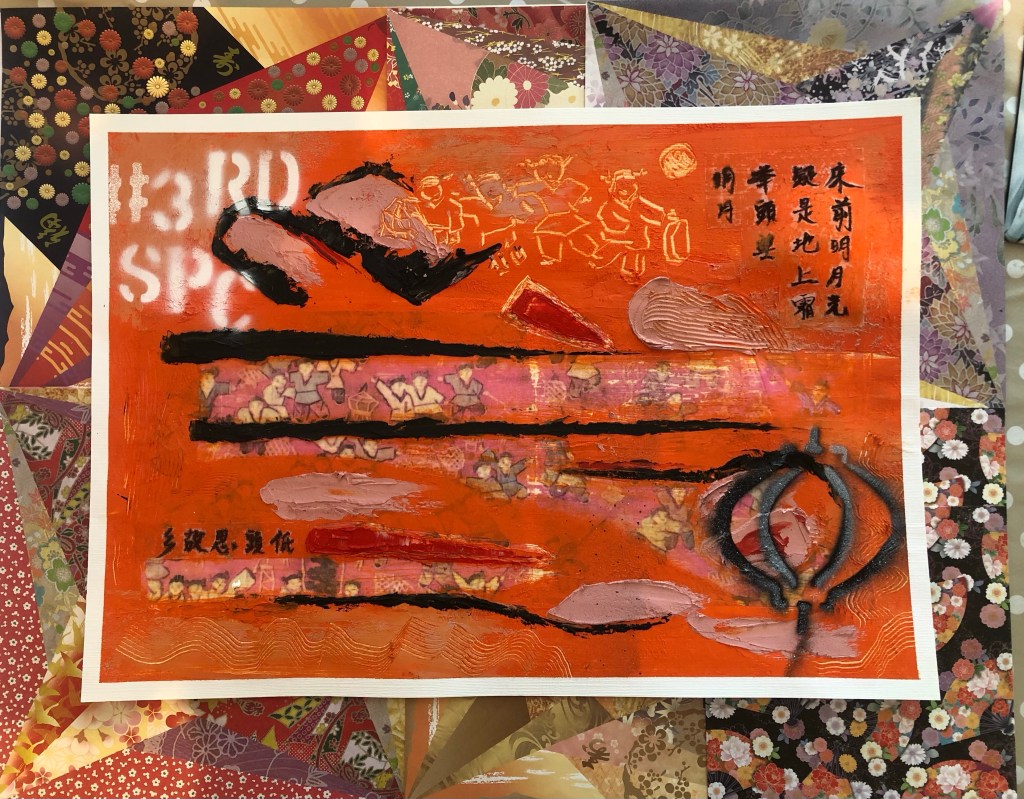
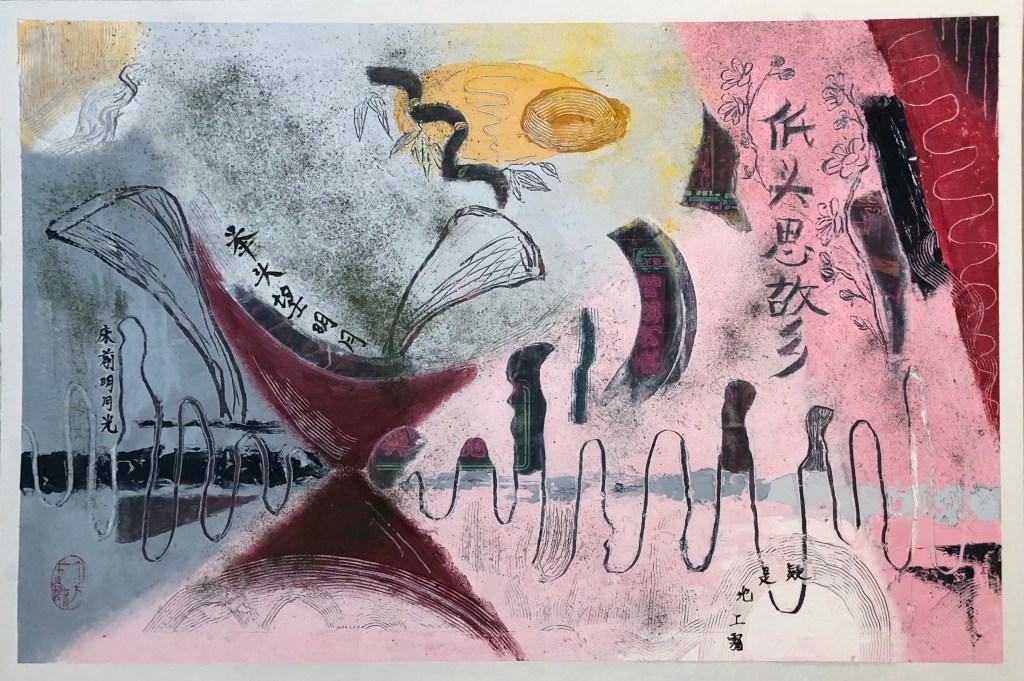
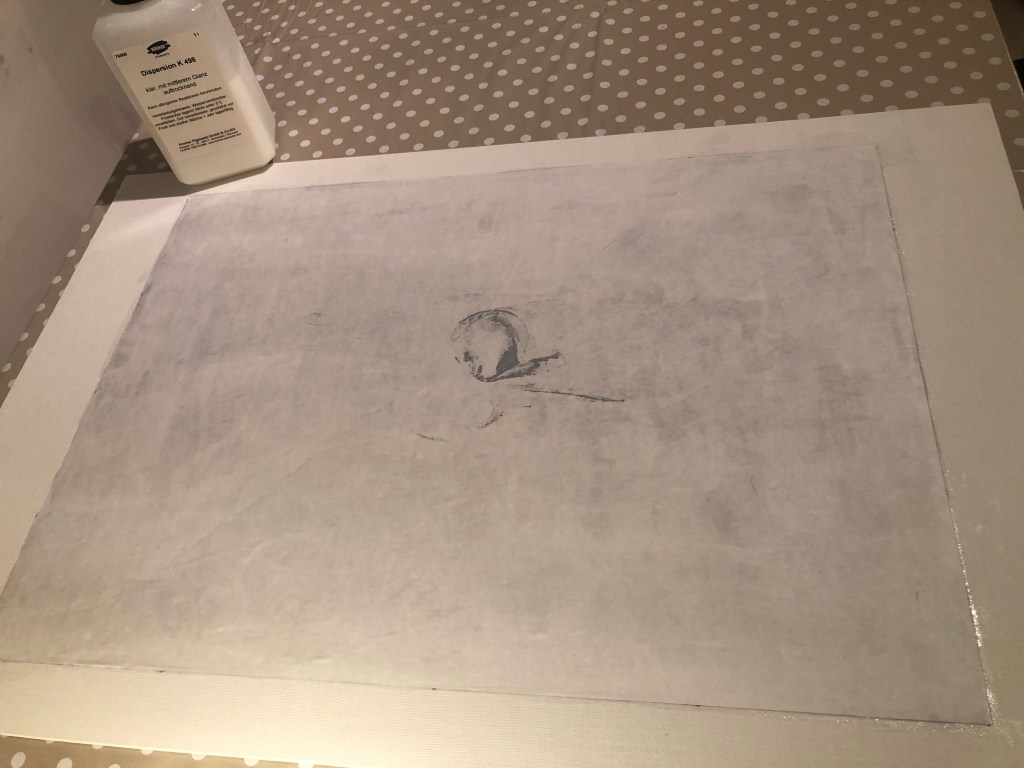
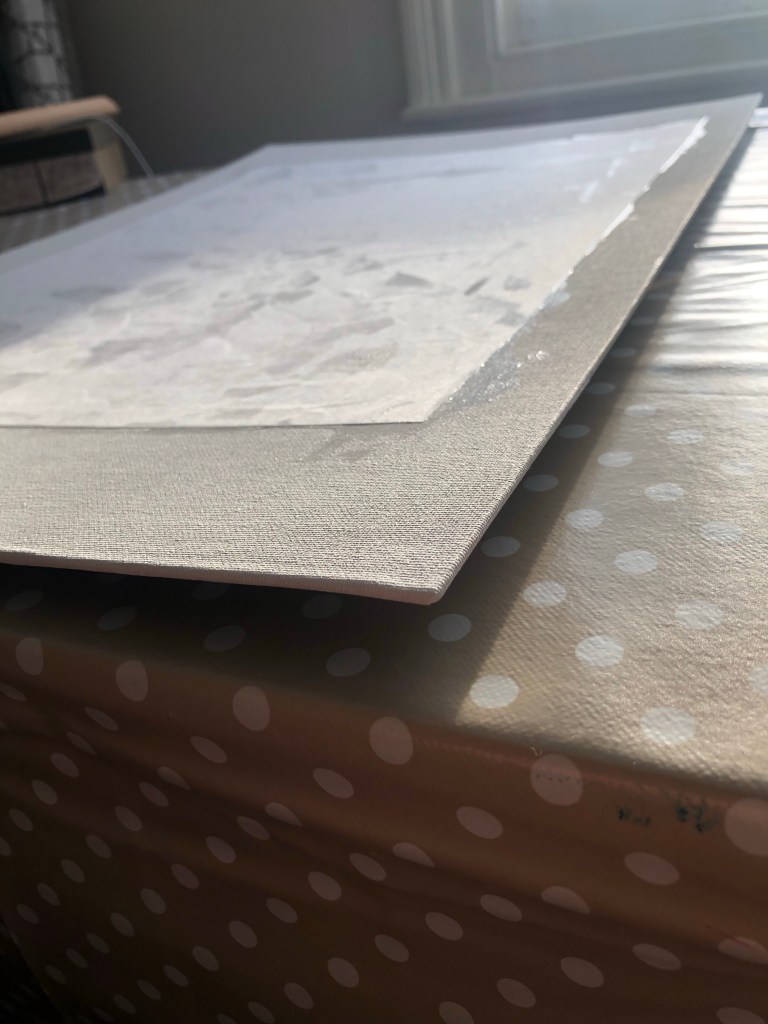
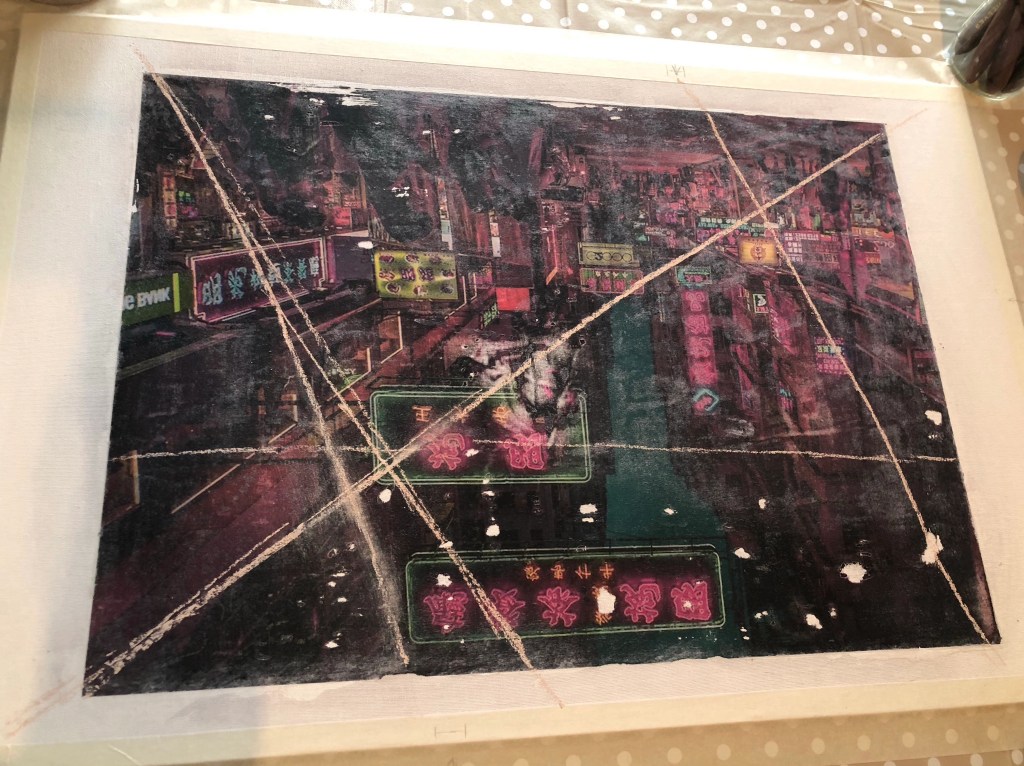
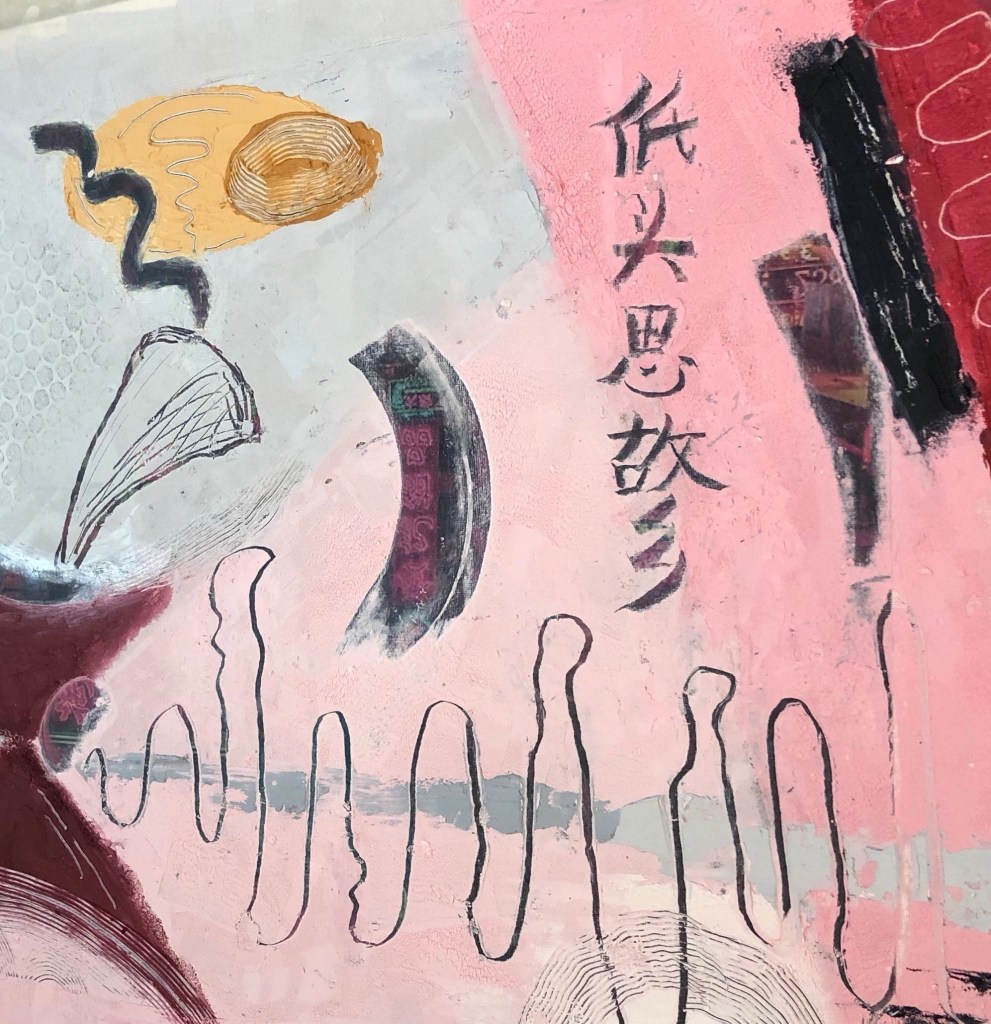
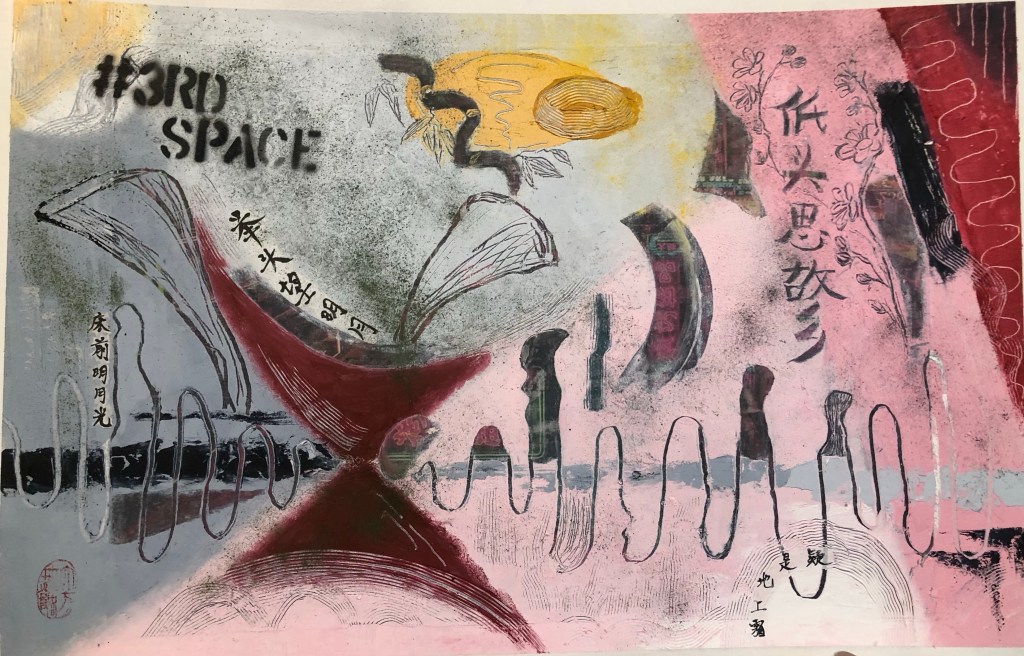
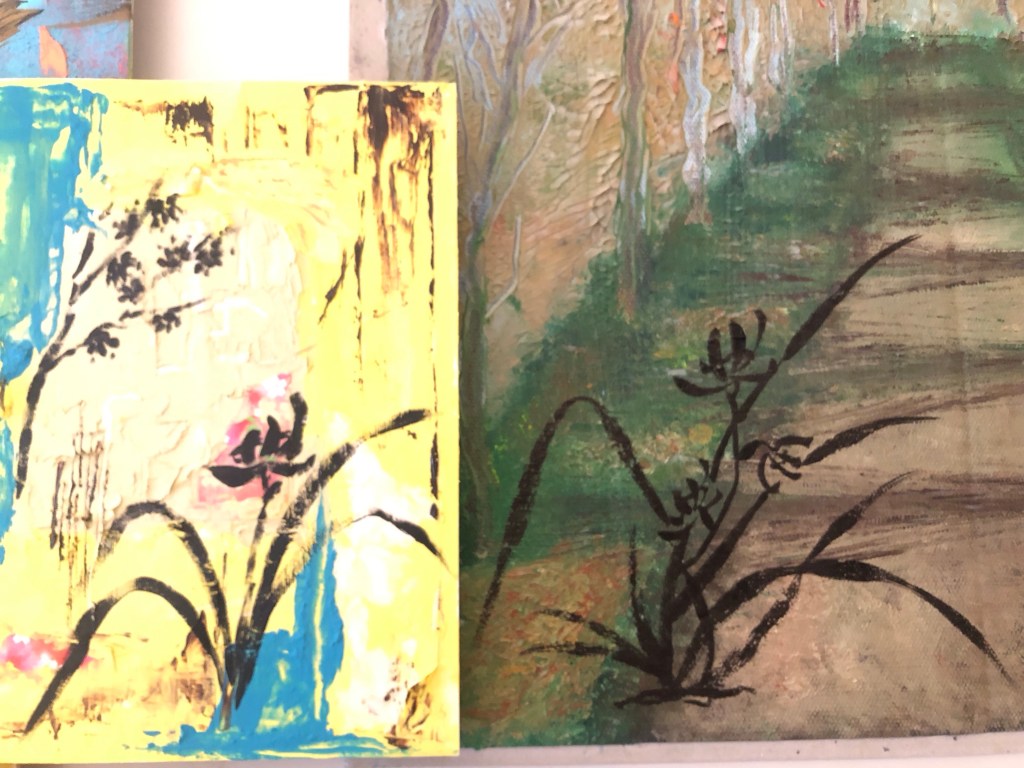
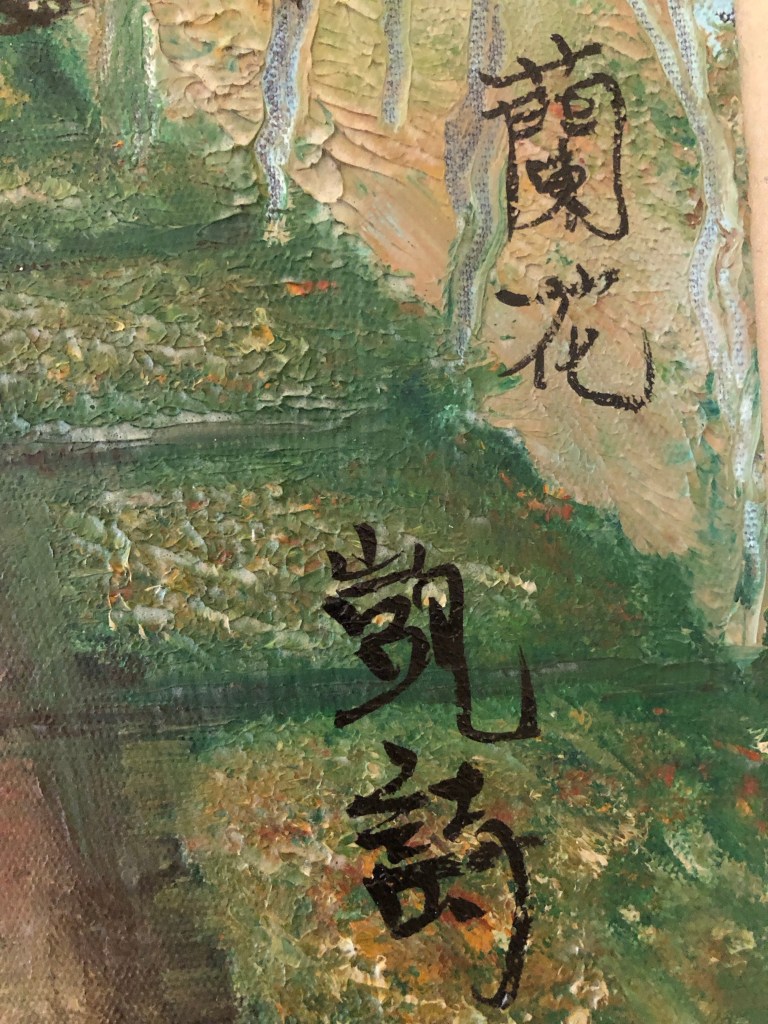
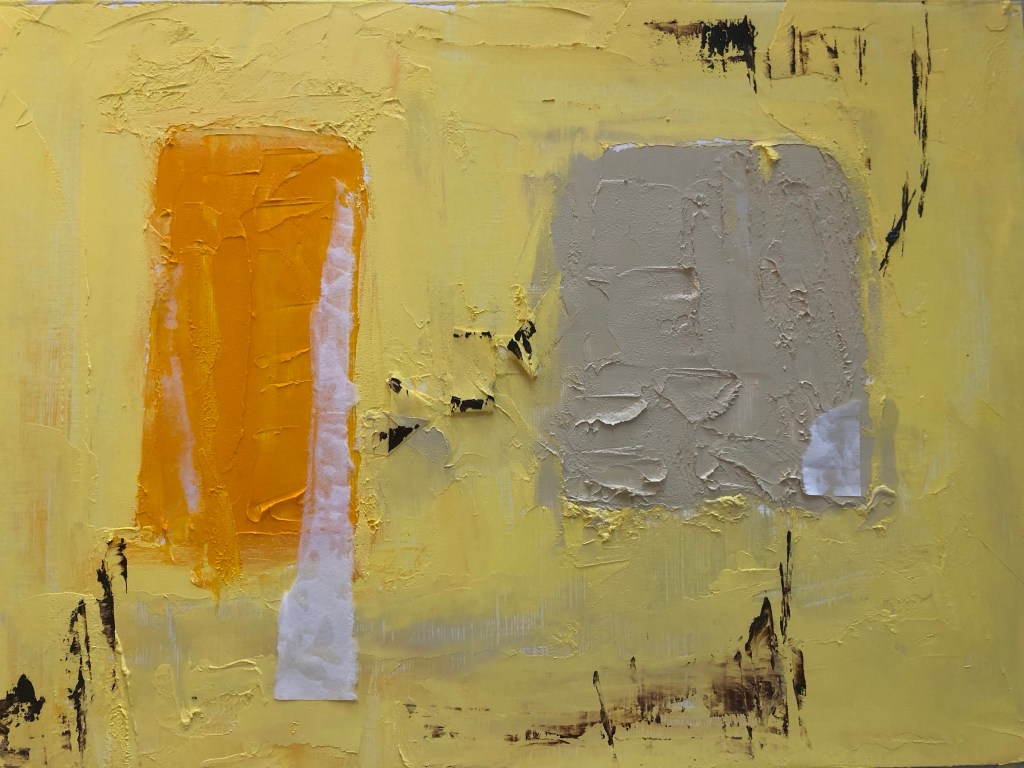
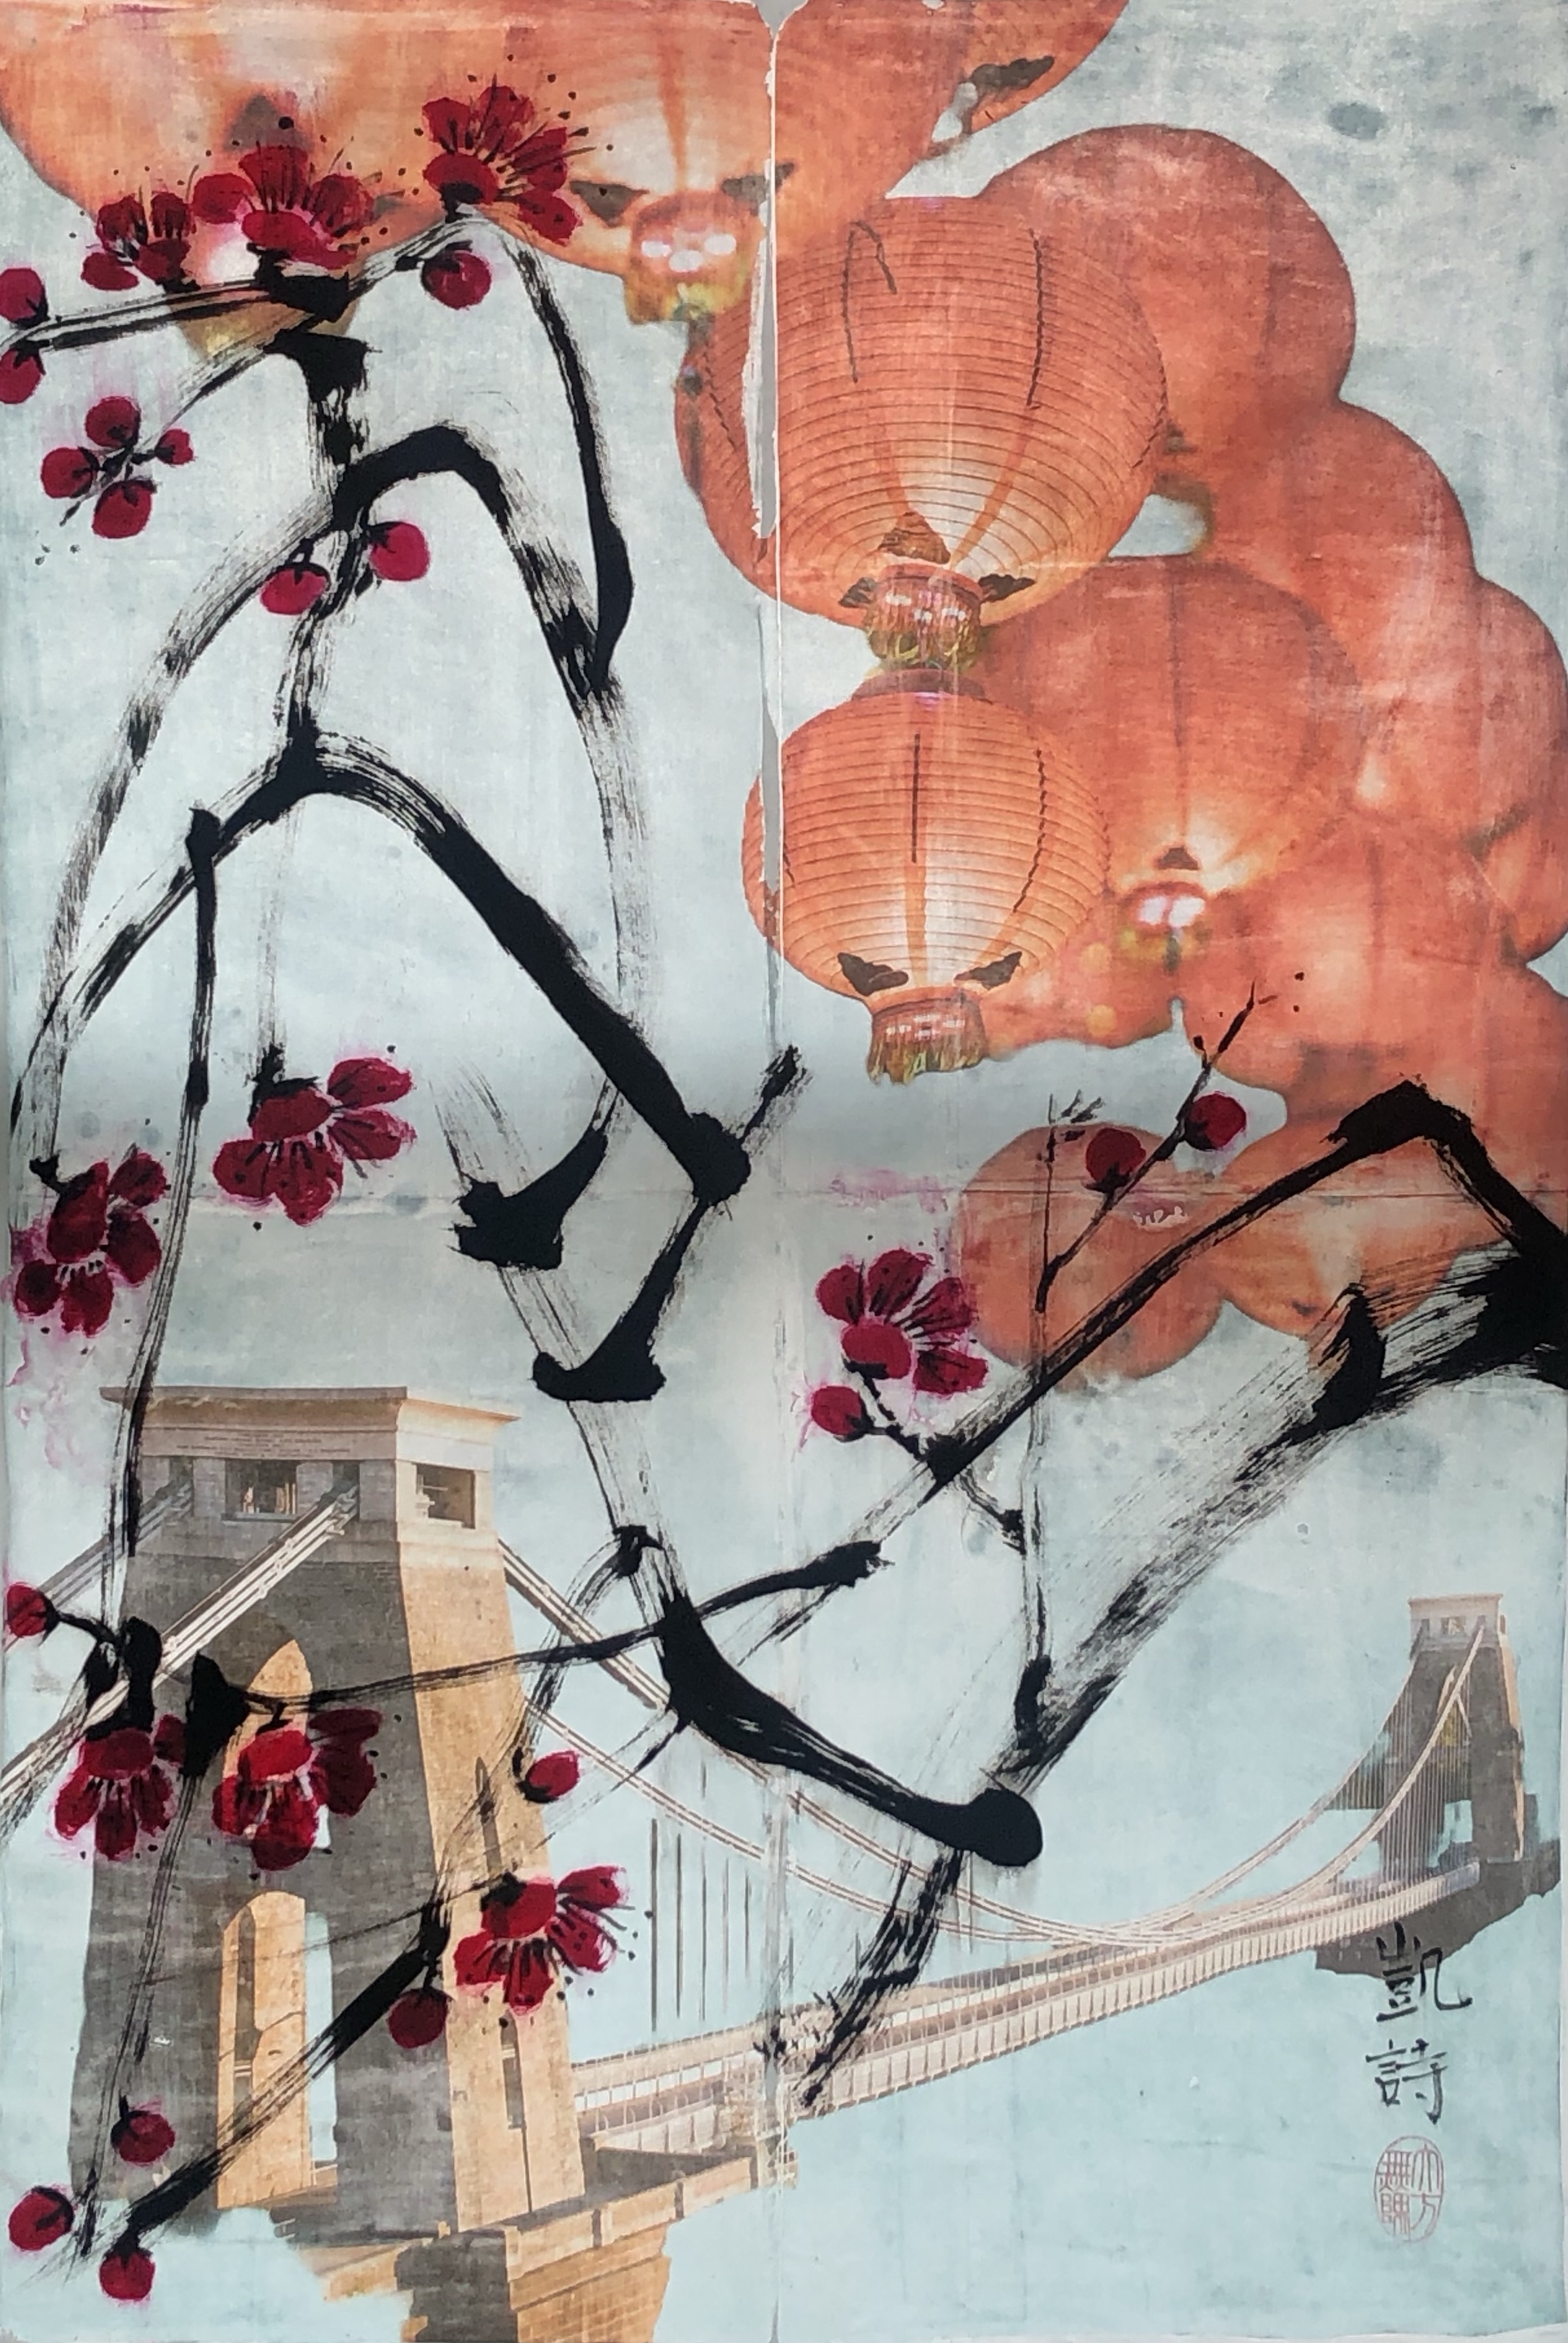
Below is a piece of work that I did a year ago and I now want to pick it up and develop the piece further with some new ideas, materials knowledge and techniques that I have learnt since starting the MA. The work was originally created using dispersion liquid to transfer a digital collage image from paper to a polyester satin canvas, then the Chinese brush painting was painted on top in ink. 

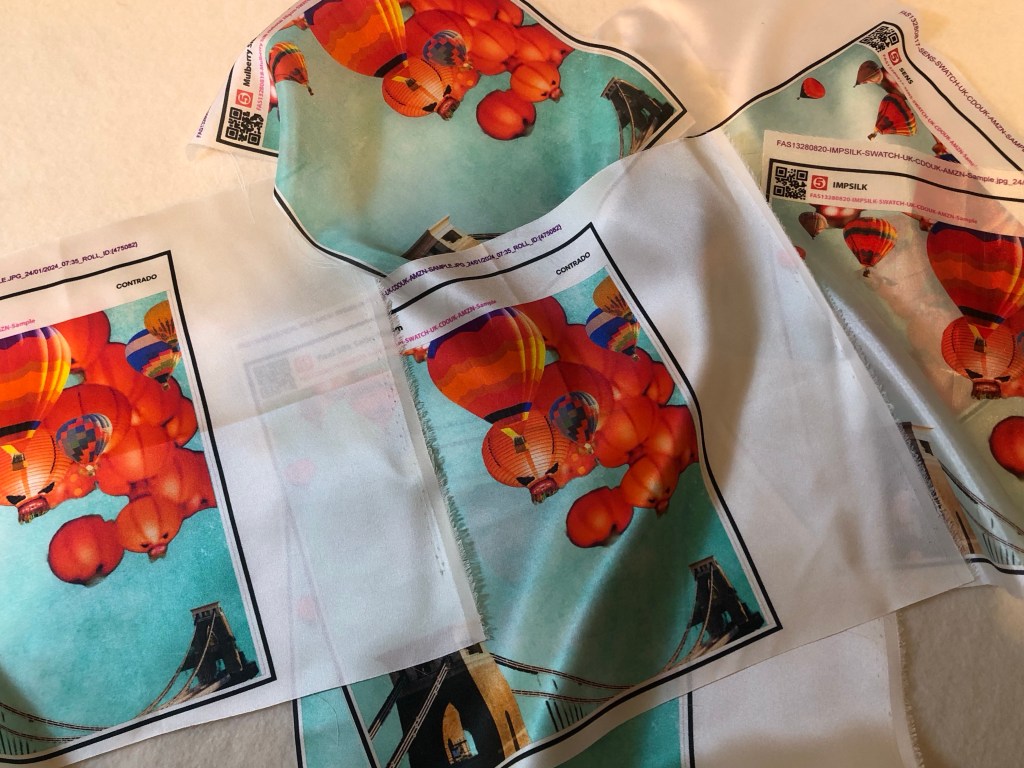
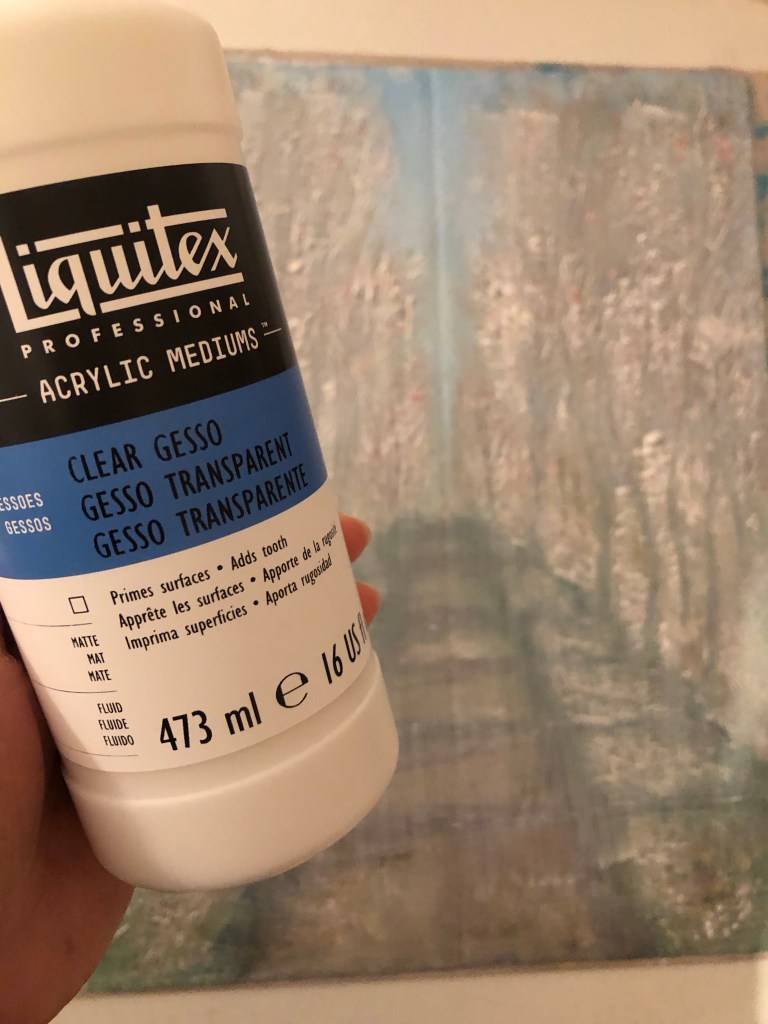
I have recently researched into using better quality fabric as the canvas for digital printing as well as for Chinese brush painting. The findings are documented here and the results will be used in this work:

MA Y1 U1: Research – Digital printing on fabric

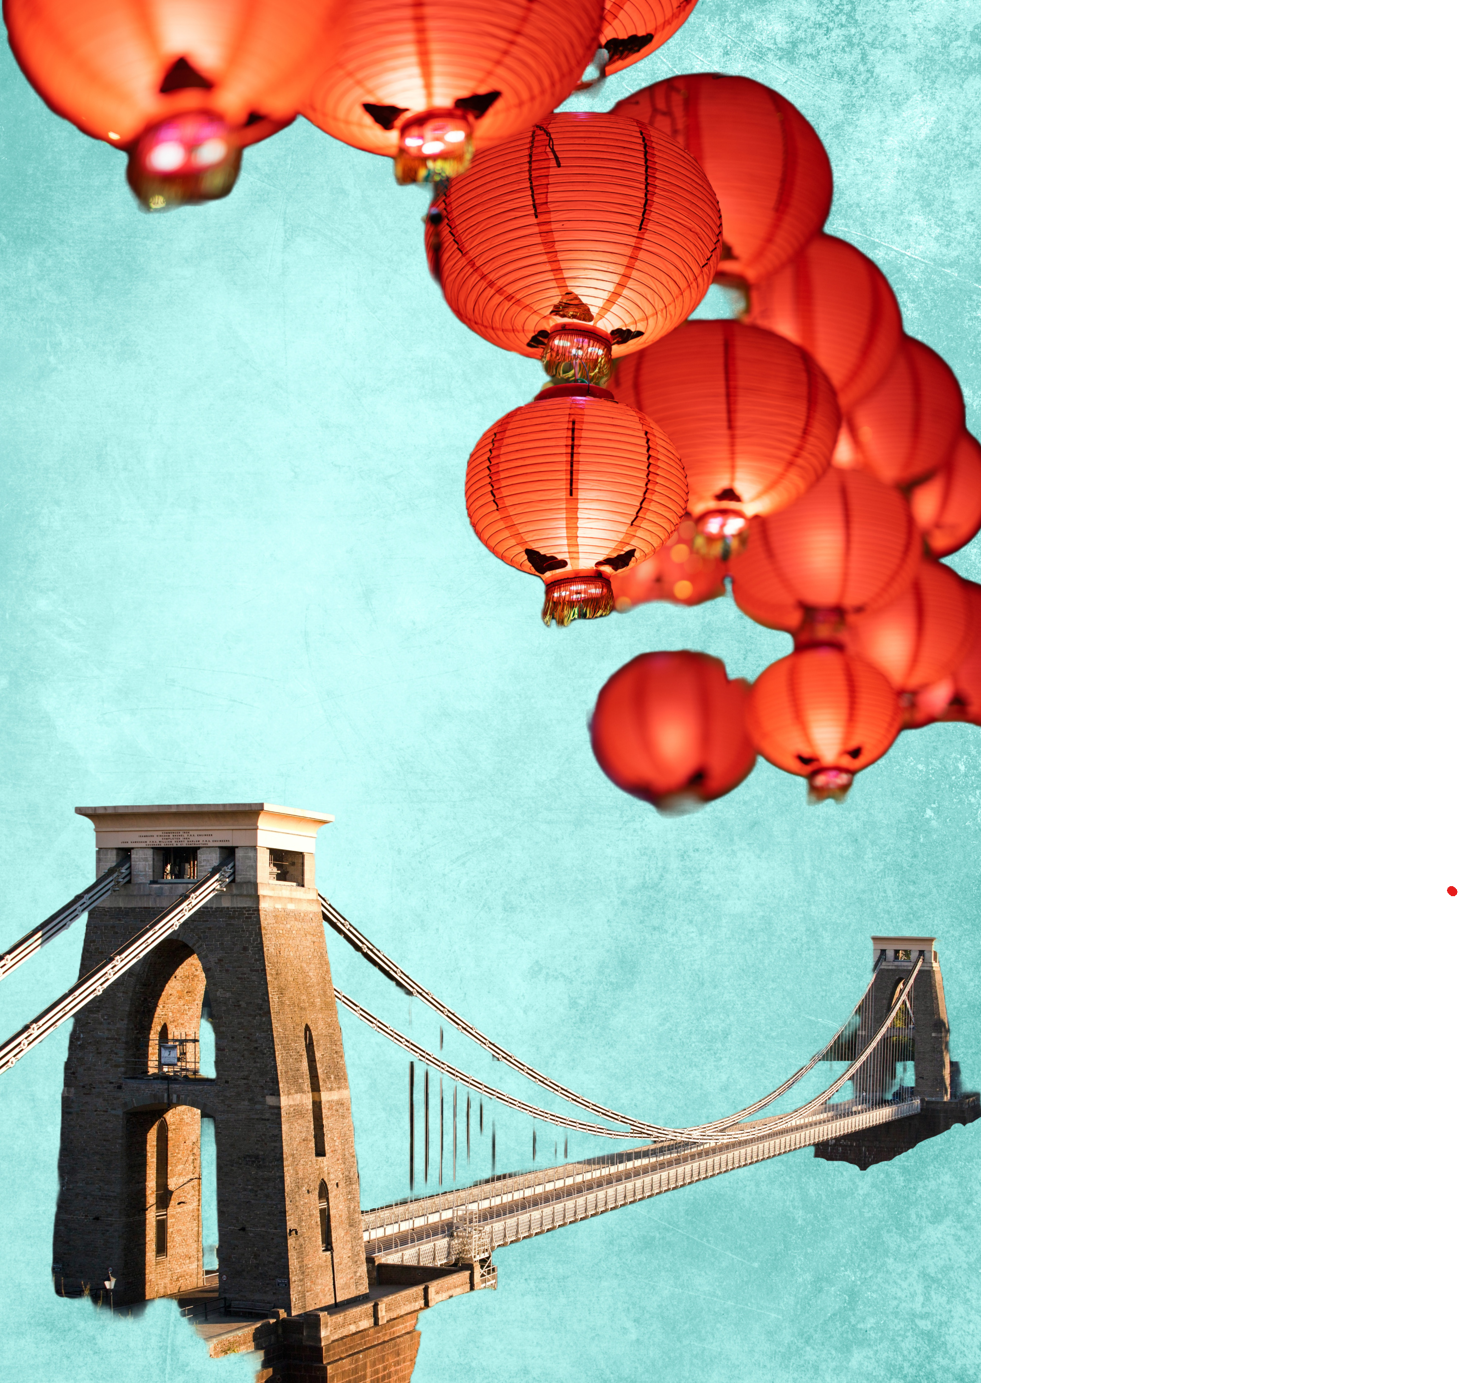
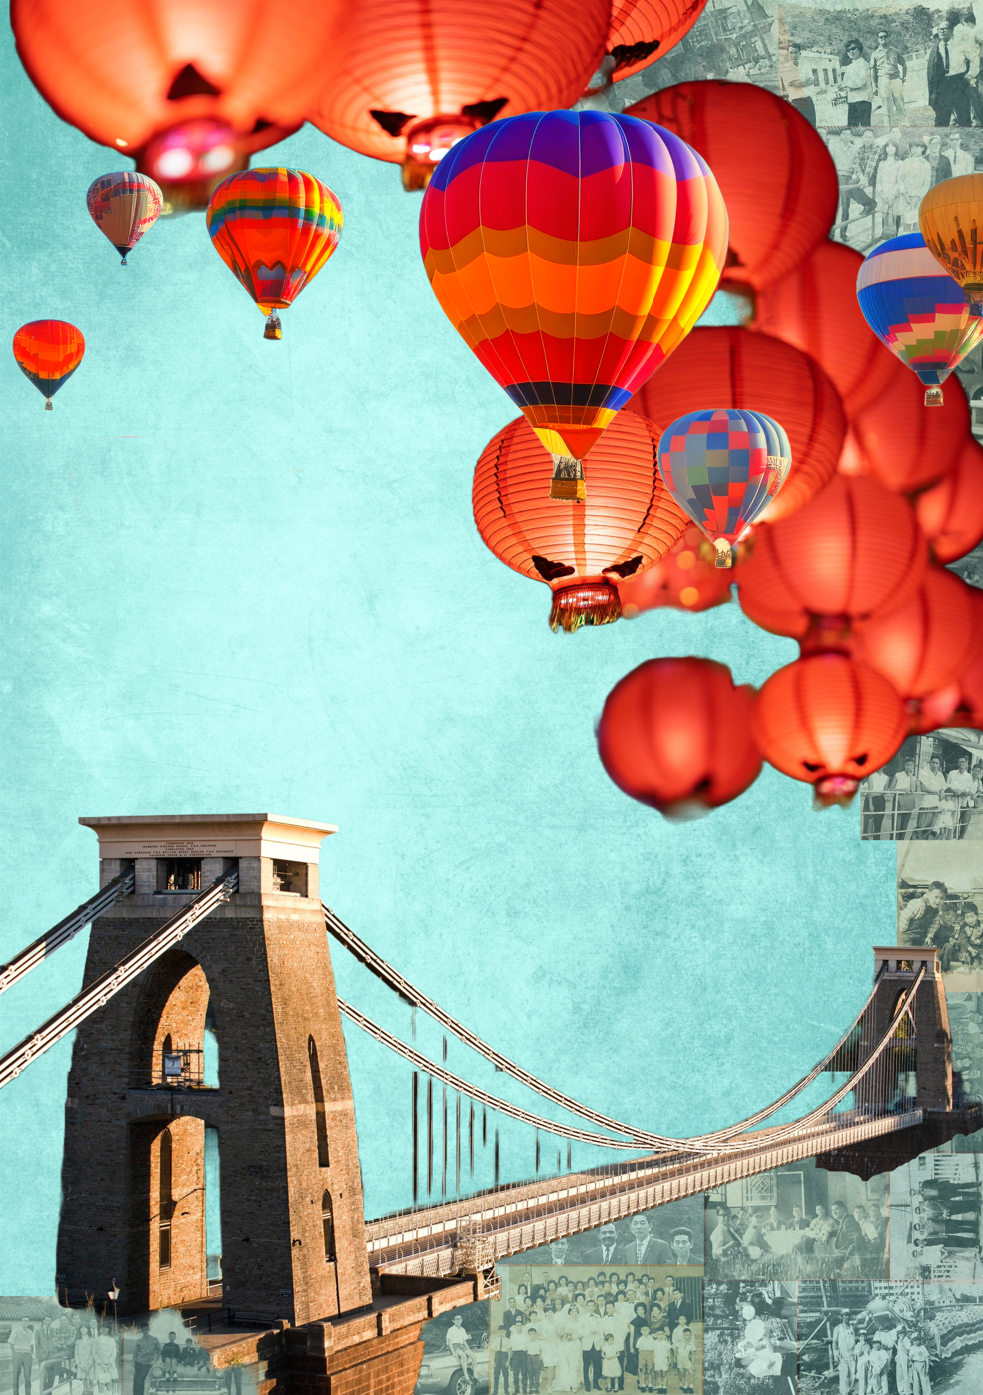
Below is the original digital collage created using Adobe Express. It has an image of the Bristol Clifton Suspension Bridge which is a famous iconic bridge in my home city of Bristol. I live very near the bridge and often drive or walk over it – it has meaning for me and is one of the images that means ‘home’ to me. Every August, there is a Bristol Balloon Fiesta and there are many images online with hot air balloons flying over the Clifton Suspension Bridge – again, those are iconic images for Bristol. When I made this original digital collage, I used Chinese lanterns instead of hot air balloons flying over the bridge as an attempt to create an overall effect that combined things from the different cultures that have been part of my life. The background teal colour and effect were purposely ambiguous – is the background image associated more with Chinese or Western culture? It’s up to the viewer to interpret.

METHOD

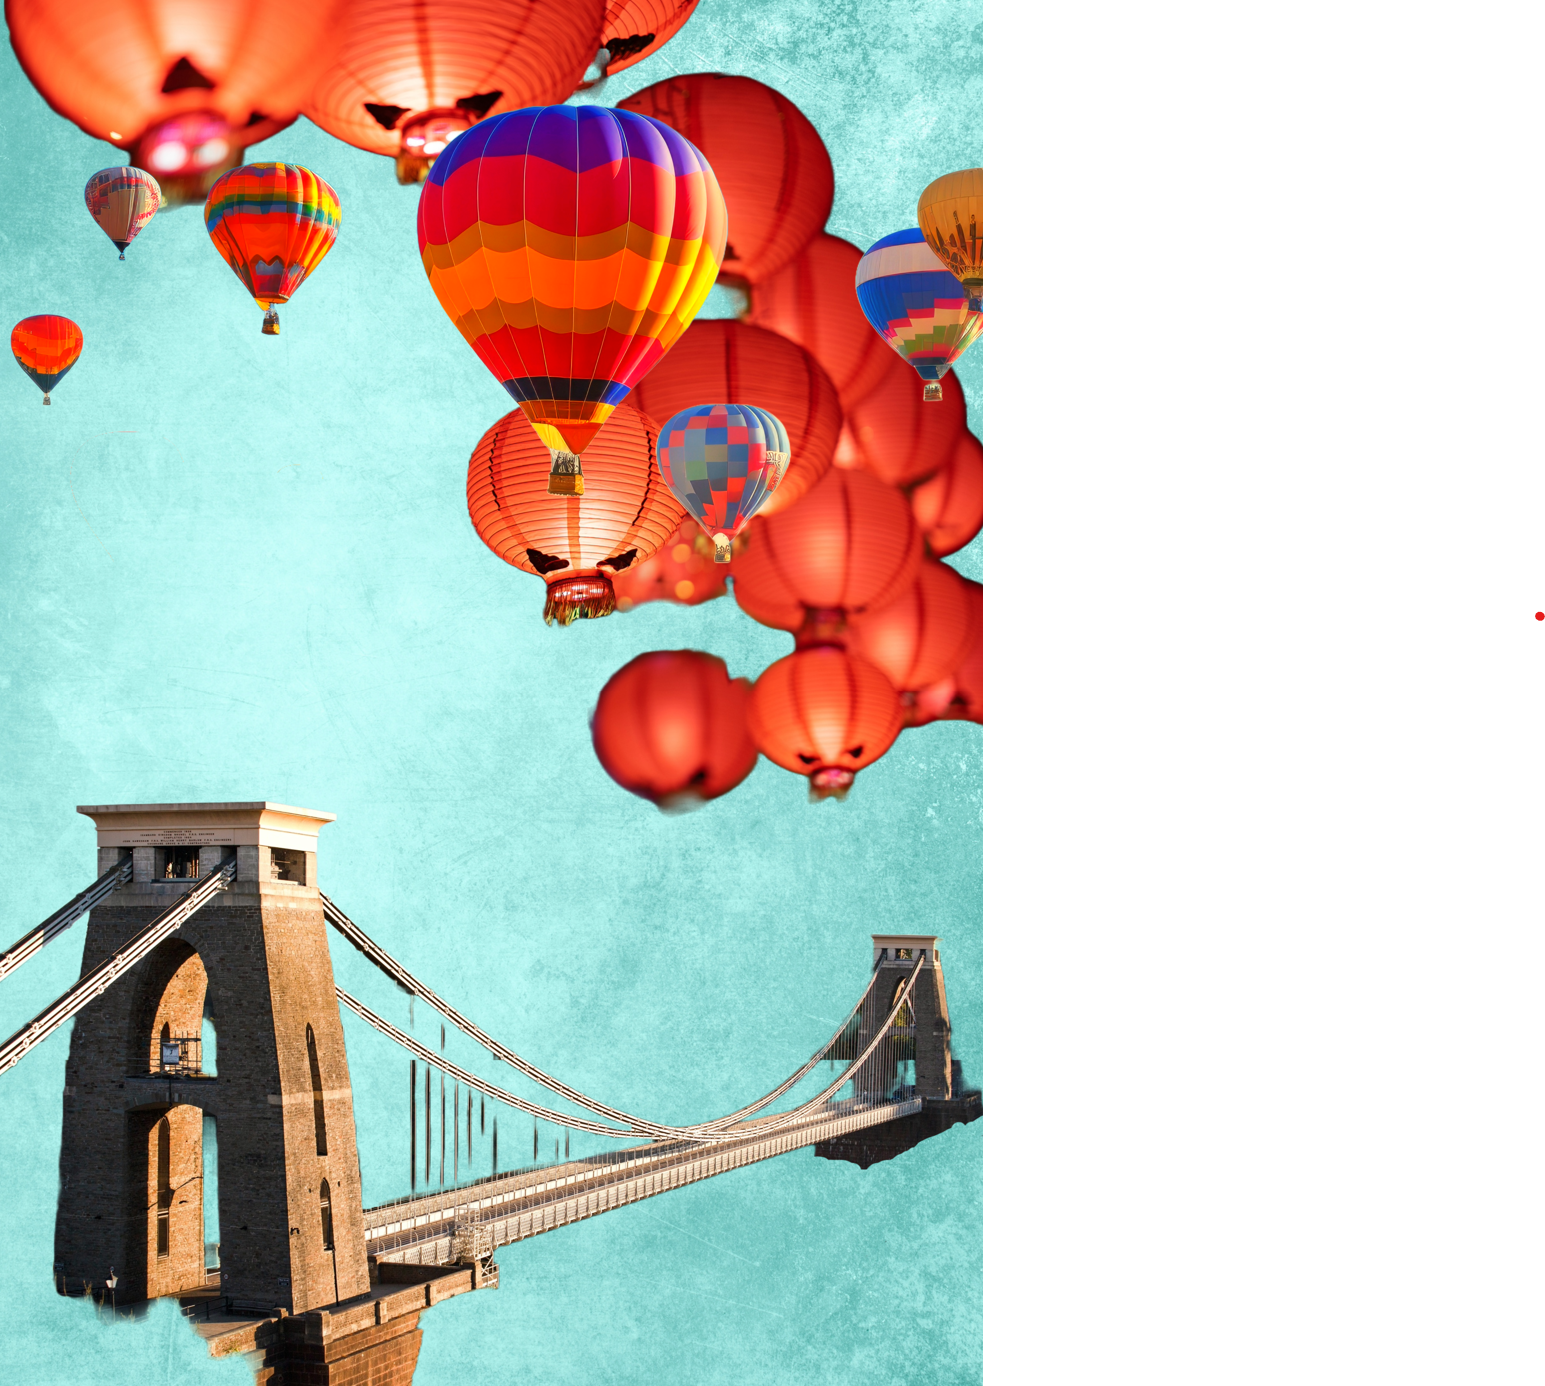
Taking the original image, I wanted to create more depth and interest in the sky. Therefore, a few hot air balloons were layered over the top in the foreground with the Chinese lanterns appearing to be further back giving a better feeling of depth. Different hot air balloon images were tried and this was the final version. The colours of the balloons were adjusted in the software to harmonise with the existing images. I was happy with the bridge image and no further changes were made to that.

As part of my narrative development work, I have been researching my family in Hong Kong and I have been given many old family photographs. I remember the photos very well because they were from the family photo albums at my childhood home. I have been wanting to use the photos in my work but I have been reluctant because I have not resolved my feelings towards them – I am not sure if I am ready to use them yet. 

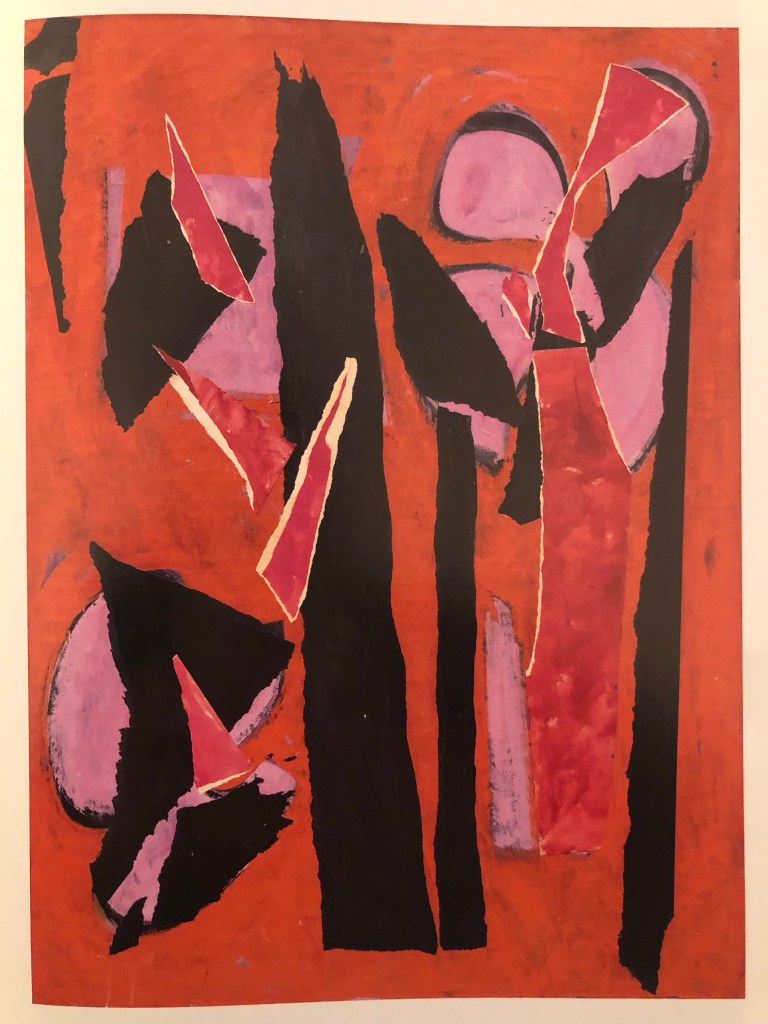
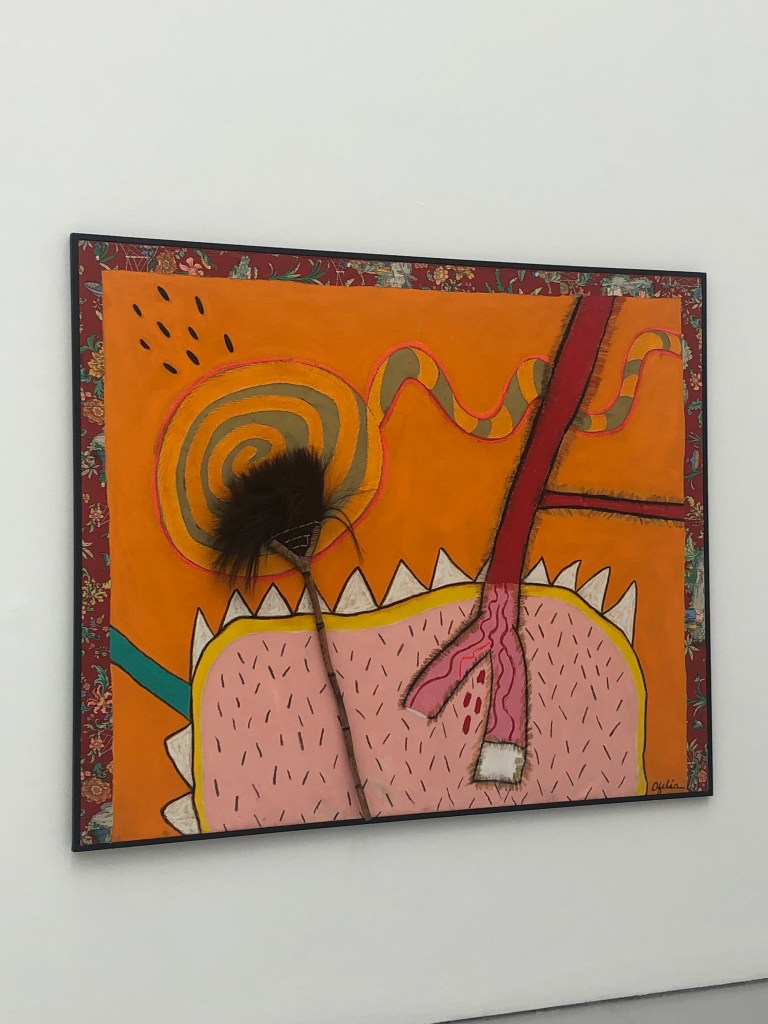
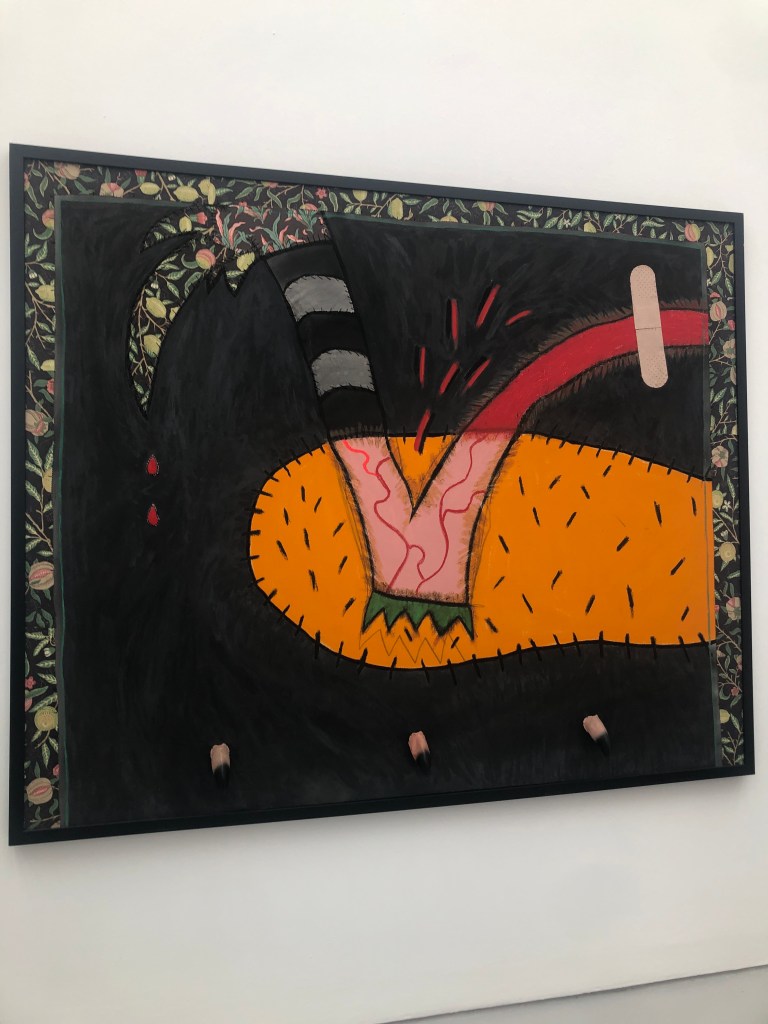
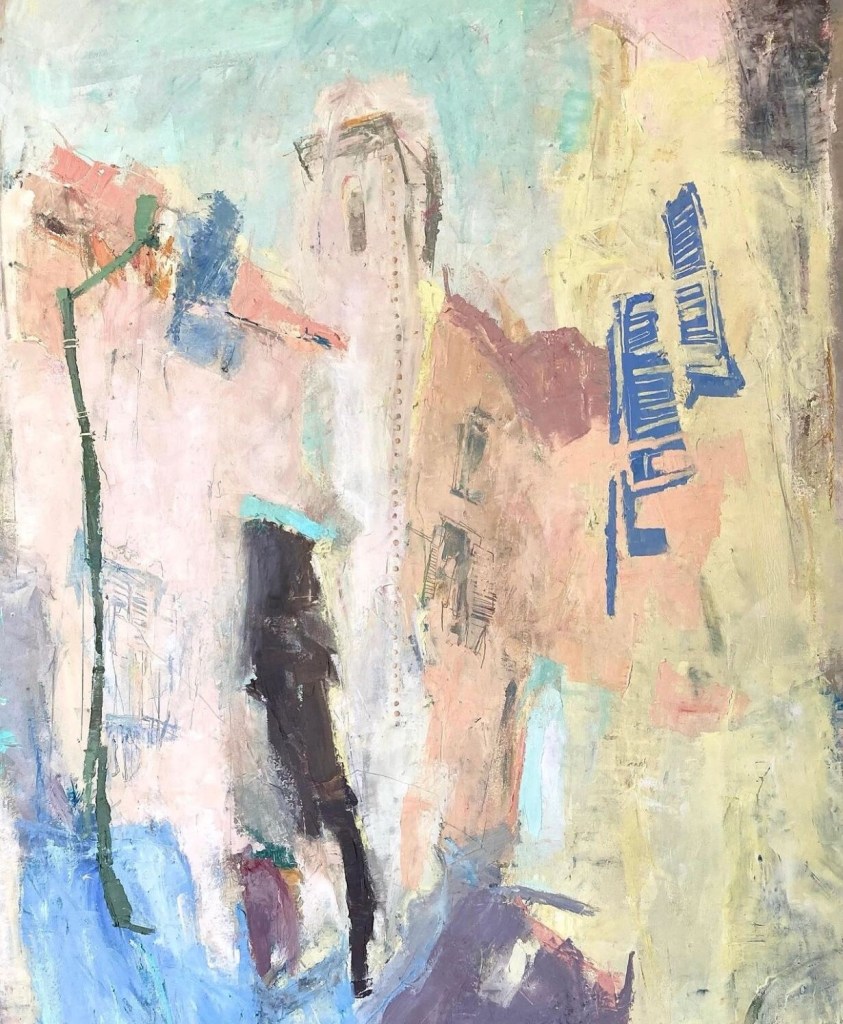
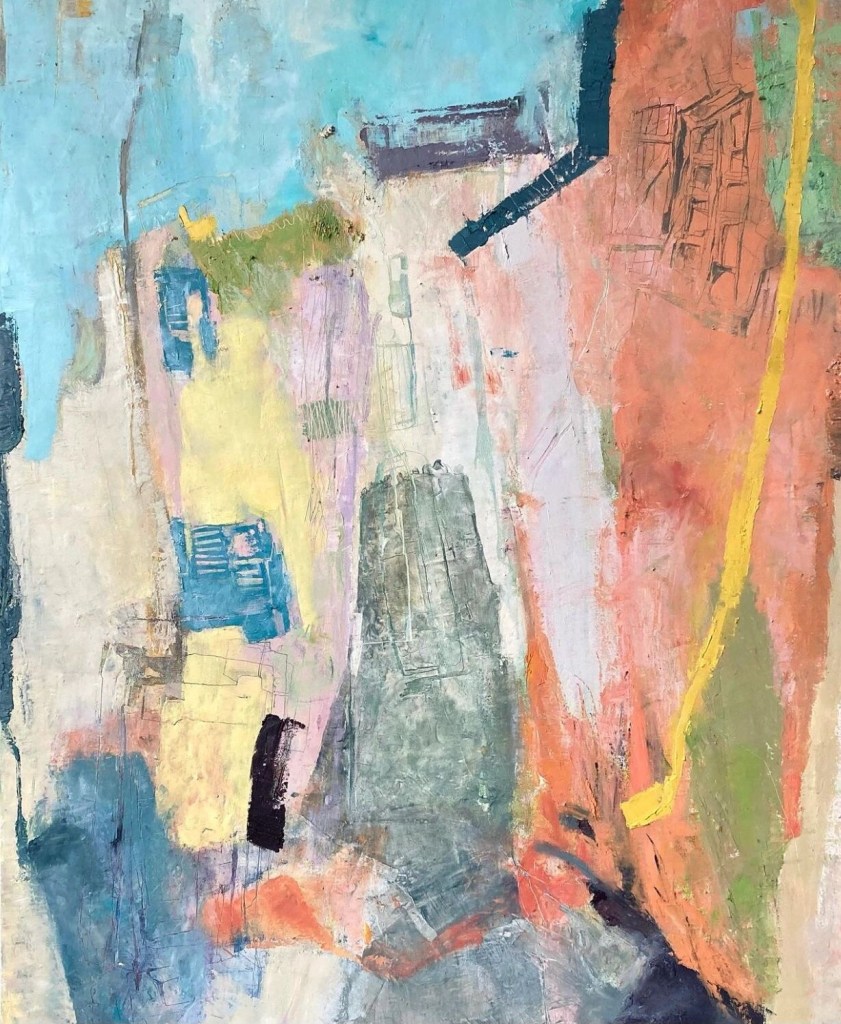
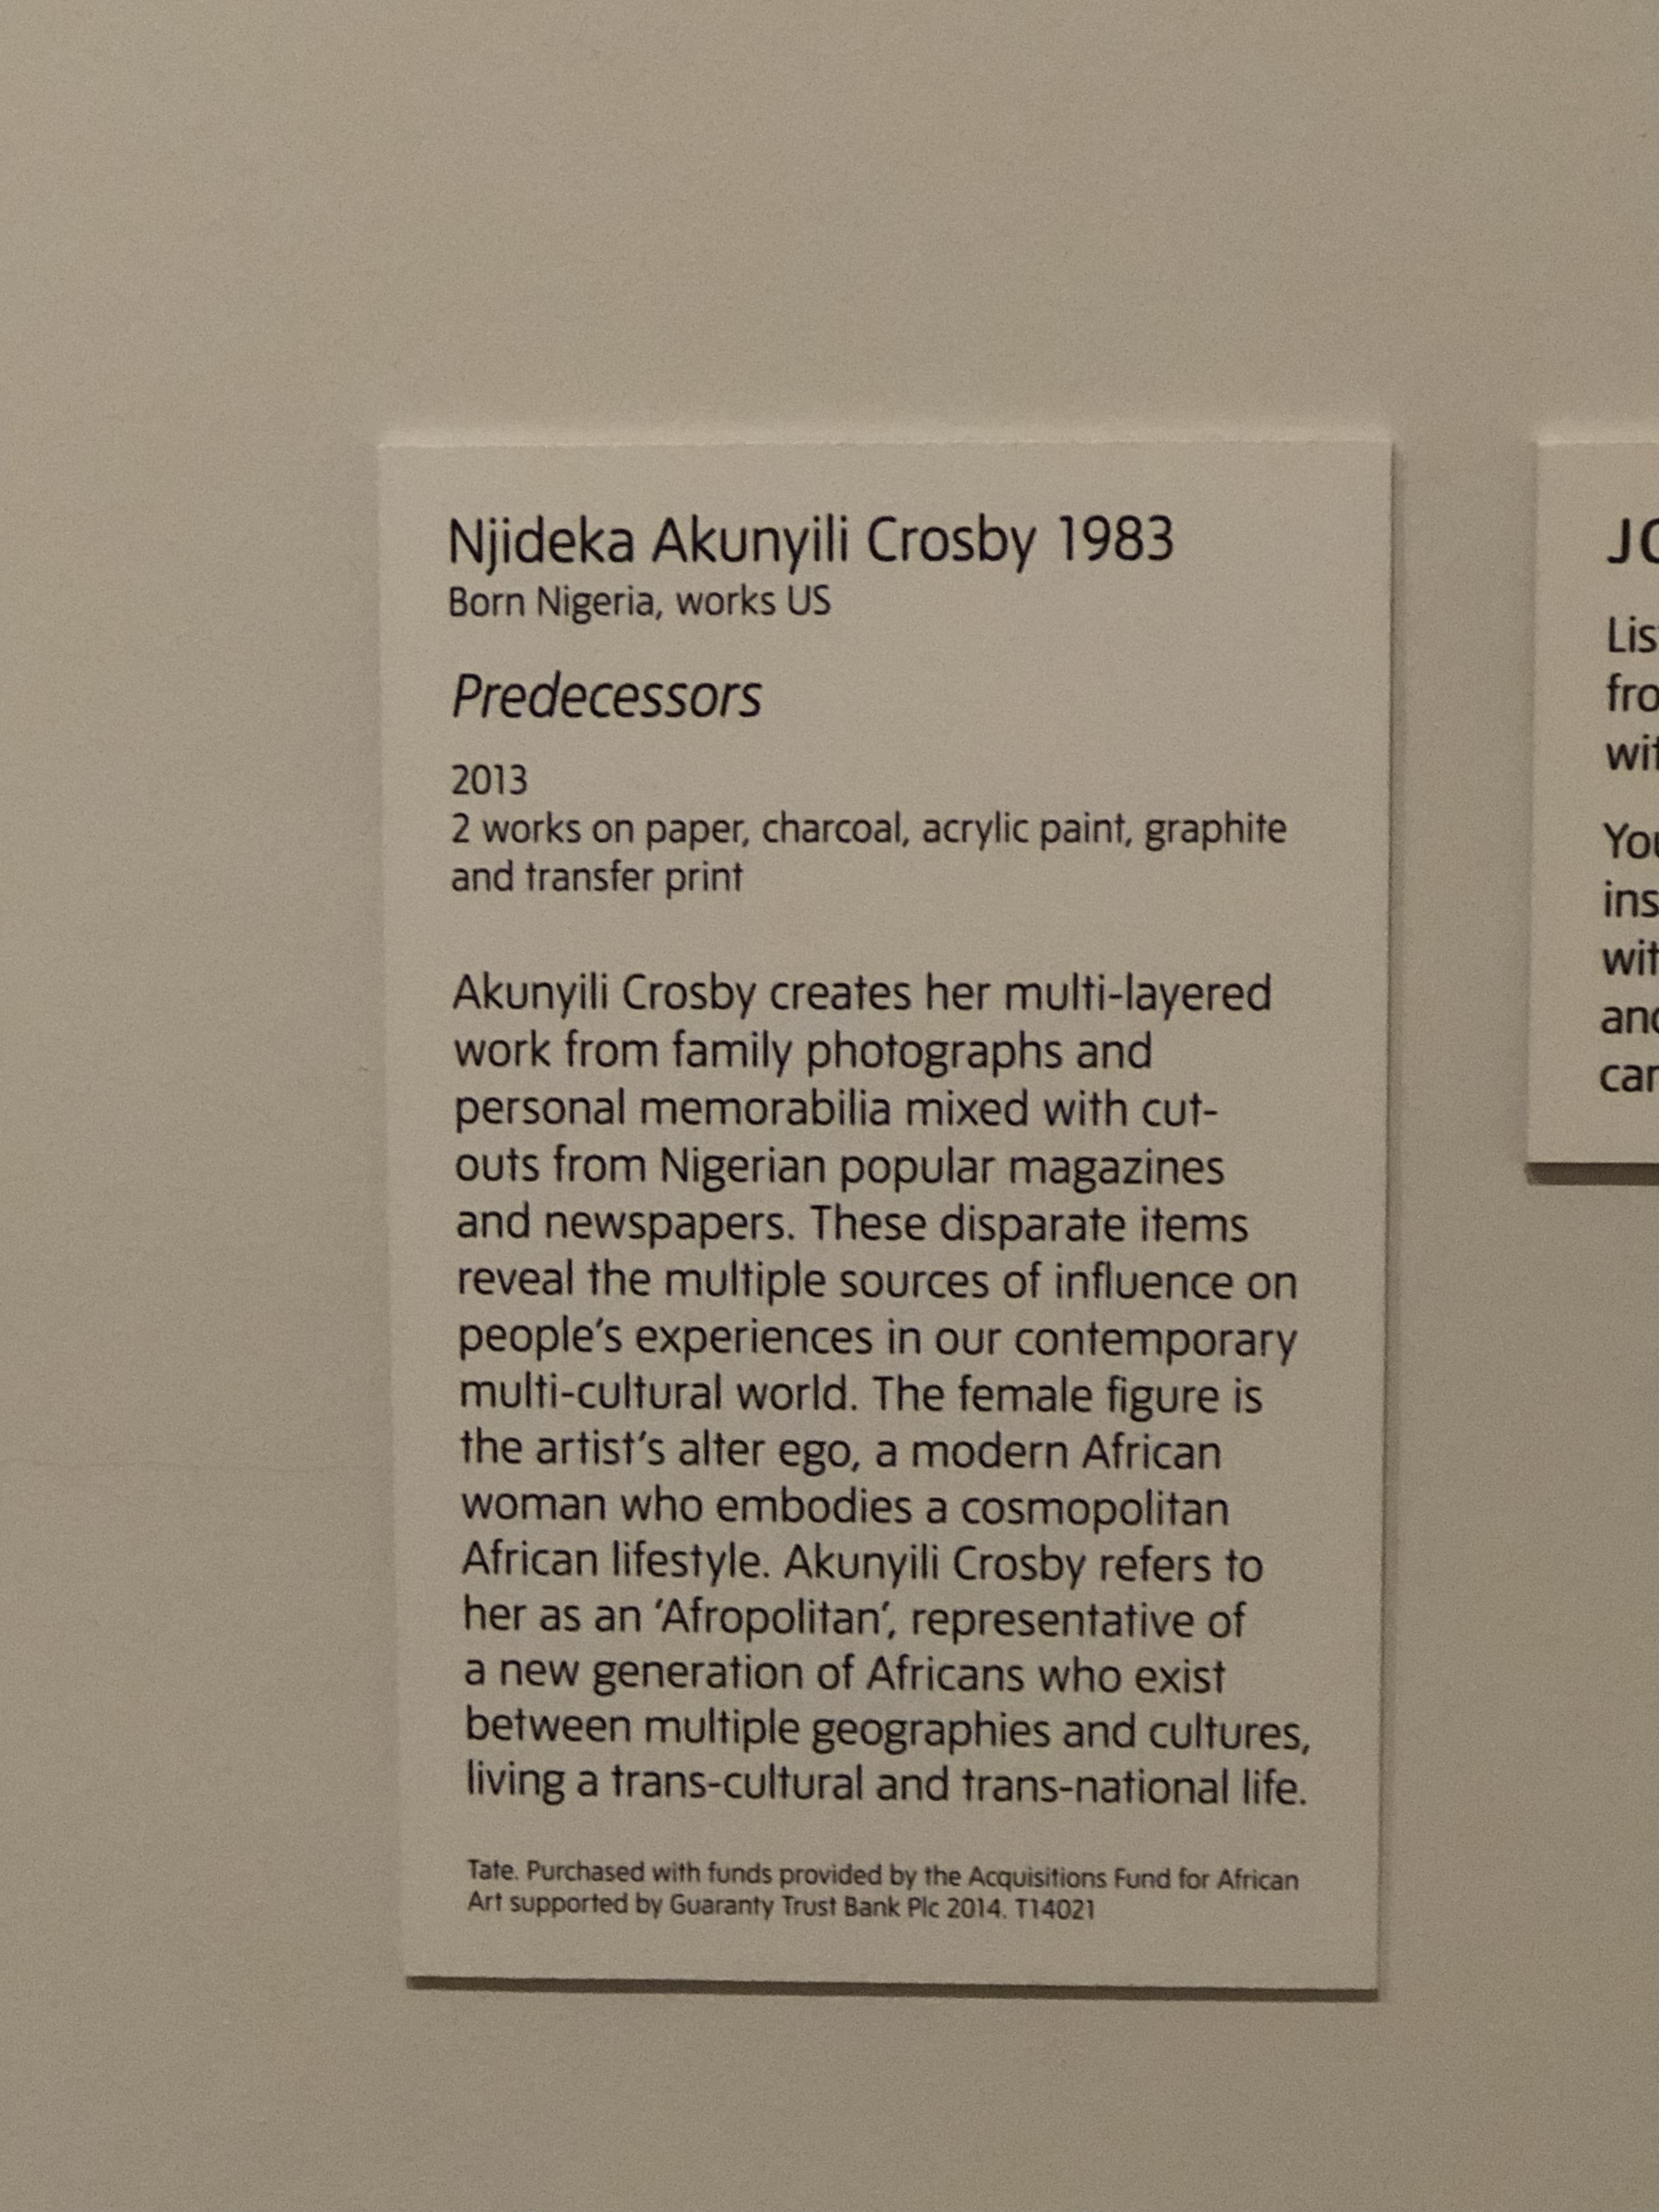
I have always taken much inspiration from the Nigerian-born American artist Njideka Akunyili Crosby and her use of personal photographs. Below is one of her paintings that I saw recently in an exhibition at Tate Modern. Her technique of using faded photo images in the background is often seen in her work. Her images are evocative and they resonate with me because of what my family photos represent for me. 

.

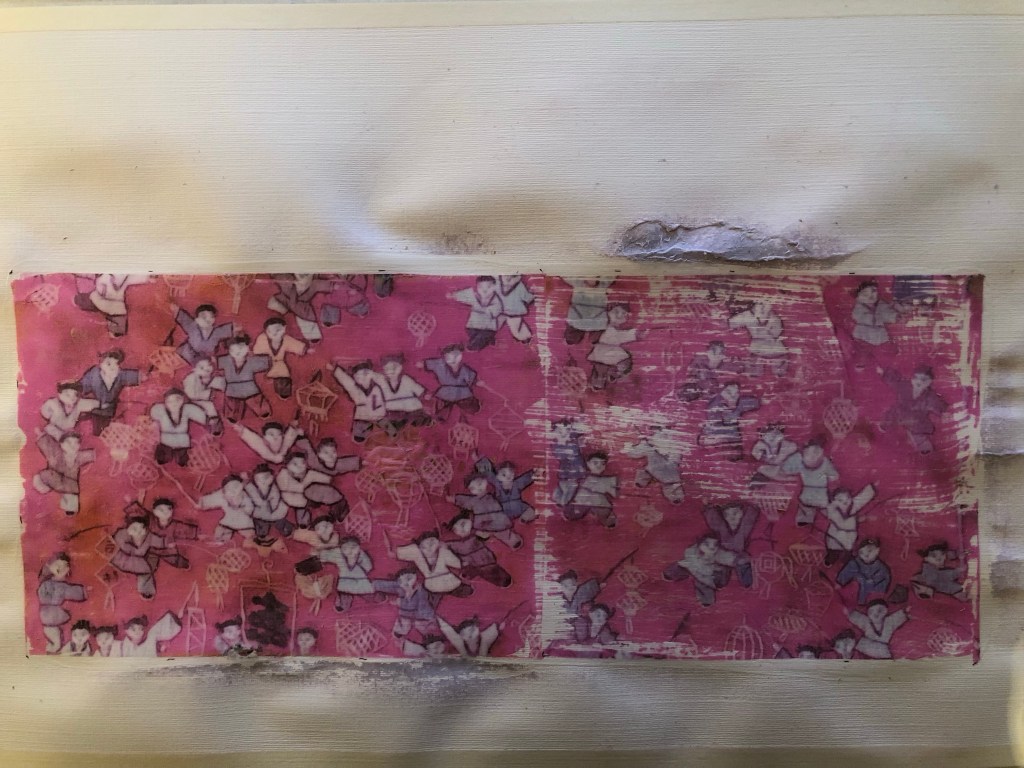
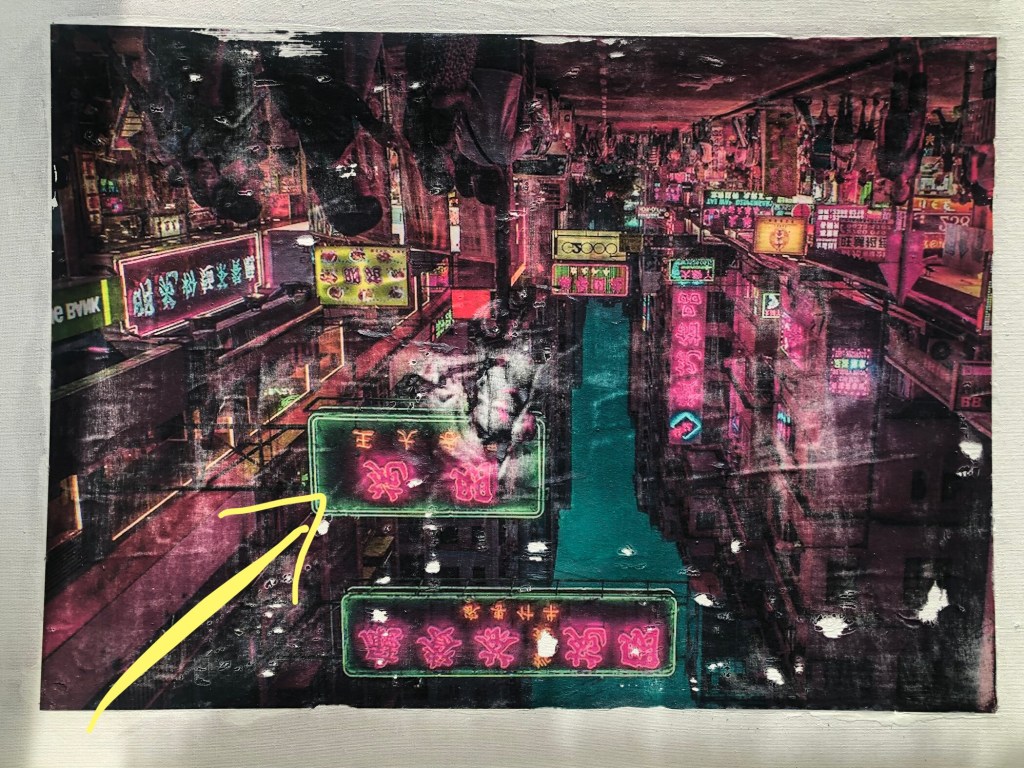
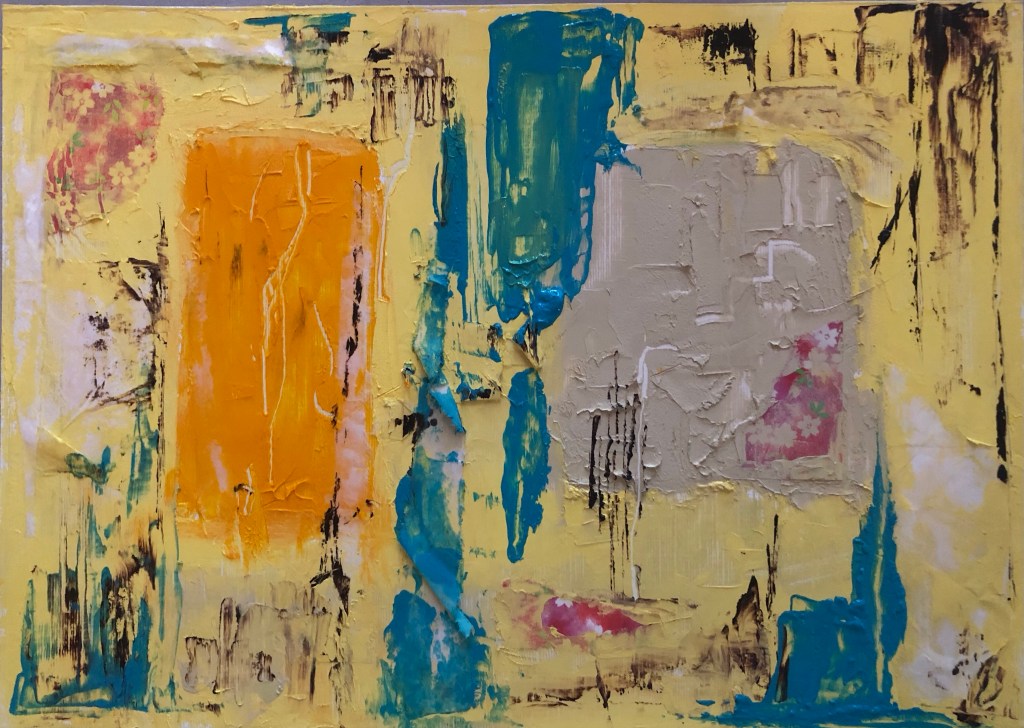
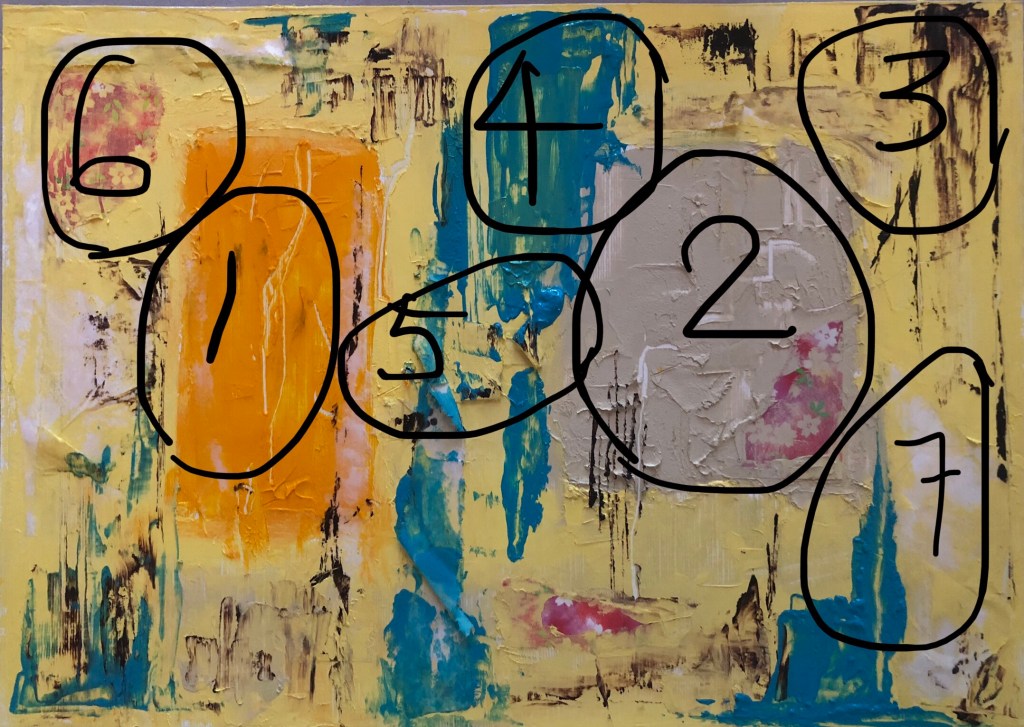
Furthermore, at my tutorial last year, I discussed my reluctance to use the family photos with my tutor and he suggested that I try to use a few, perhaps use the ones that were less meaningful to me as a trial. So I picked out a few that were of larger groups, many were family friends and not people that I had strong emotional bonds with. Nonetheless, they were wonderful photos that represented the place (Hong Kong) and a time period when my late parents were young. The photos still had meaning for me because I remember clearly seeing all of them in our family photo albums and many had images of my parents (who passed away some twenty years ago). The digital images of the chosen photos were imported into Adobe Express and arranged on the collage. The transparency of the images were increased so that the background colour of the collage came through partially giving a more faded and blended effect.

REFLECTIONS

– From a personal perspective, I am pleased with this experiment as I feel I have made progress in making use of the family photos. Getting started was a challenge because all the photo images seemed too precious to use even though they were all digitised. I stared at the images for a while before deciding to choose the less precious ones. It was a strange process in determining the ‘rating’ of how precious or personal a photograph felt to me when each one held a story. The process eased once I got started so I am happy that I did this experiment because I feel I have a way forward in using the treasure trove of all the old family photos – this part of my exploration will remain a slow process but I have made a start.

– From the technical and aesthetic perspectives, I am happy with the new learning gained in using the digital tool to manipulate the images especially with the photo transparency. The outcome was the effect that I was looking to create. My ‘aesthetic goal’ is to create a transcultural feel for the piece, meaning the work represents and originates from my ‘Third Space’ (as described in the book The Location of Culture by Homi K Bhabha). Akunyili Crosby talks a lot about making work from her Third Space, hence I find much resonance with her work.

– This work is an example of where the two strands of my practice (developing style and developing narrative) mutually inform and I hope they will eventually converge when I have developed a more definitive style.

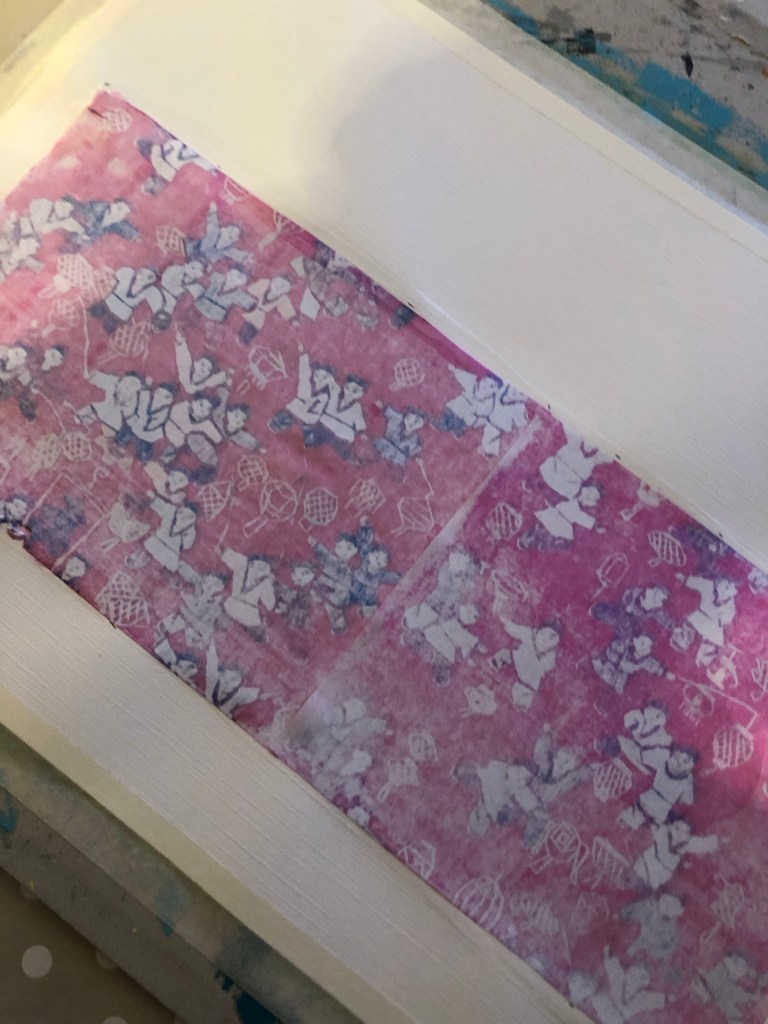
– I now have to source the fabric to print the image onto, then do a Chinese painting on top. I will source the printed fabric from Contrado as explained in this blog:

MA Y1 U1: Research – Digital printing on fabric

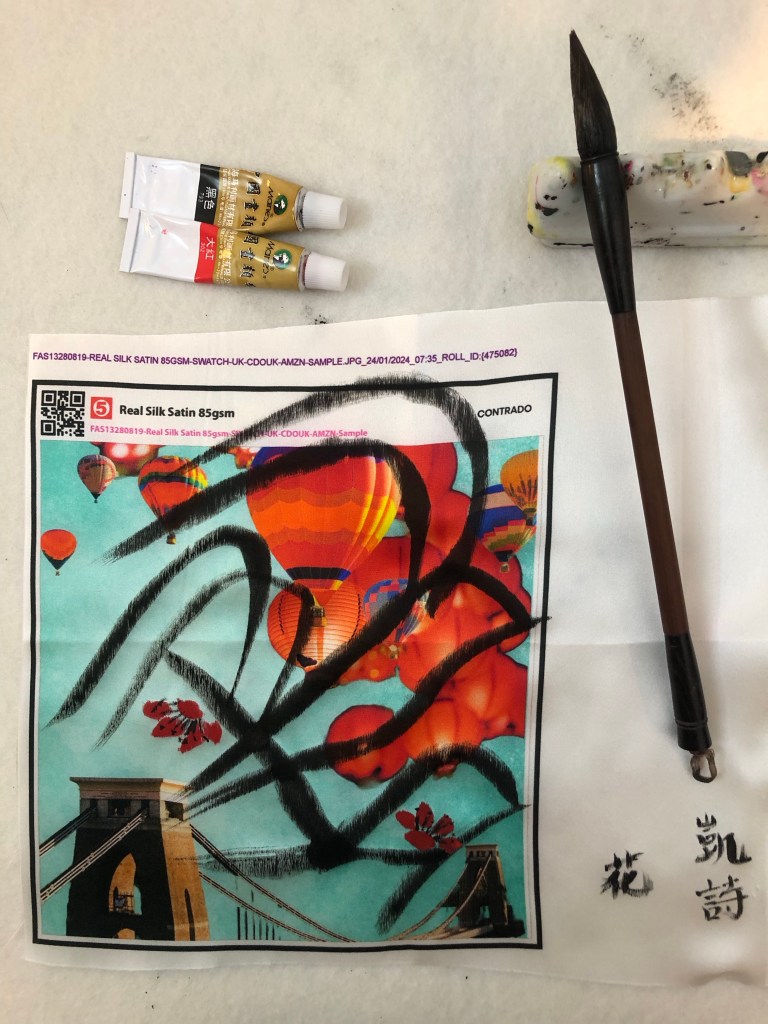
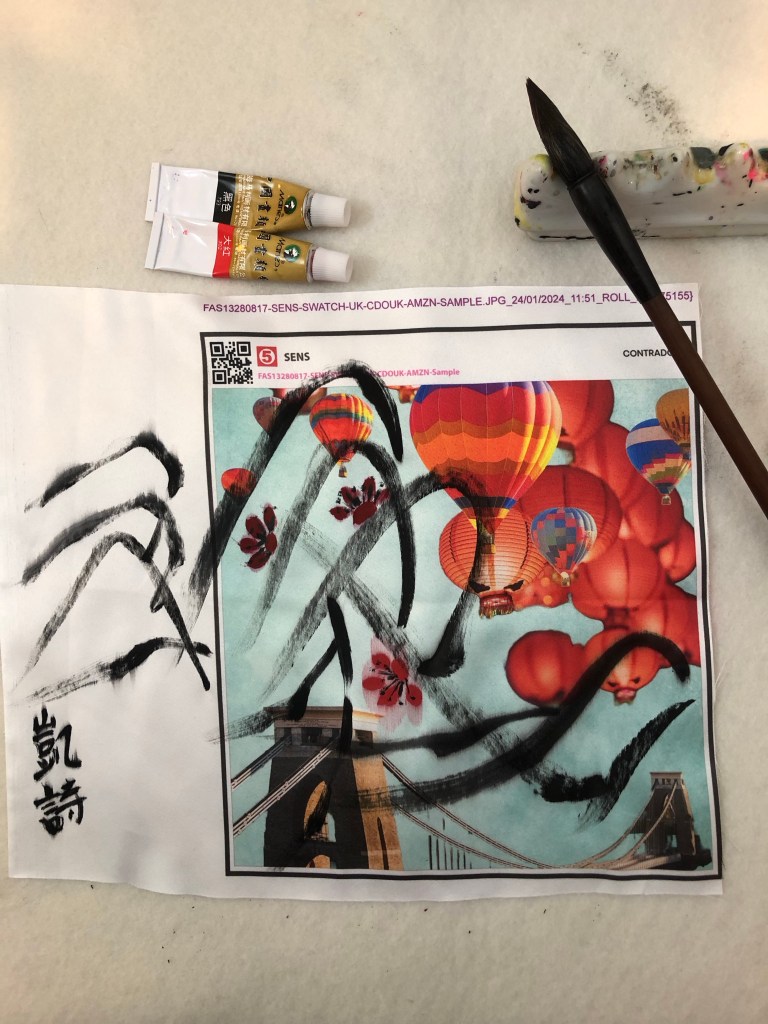
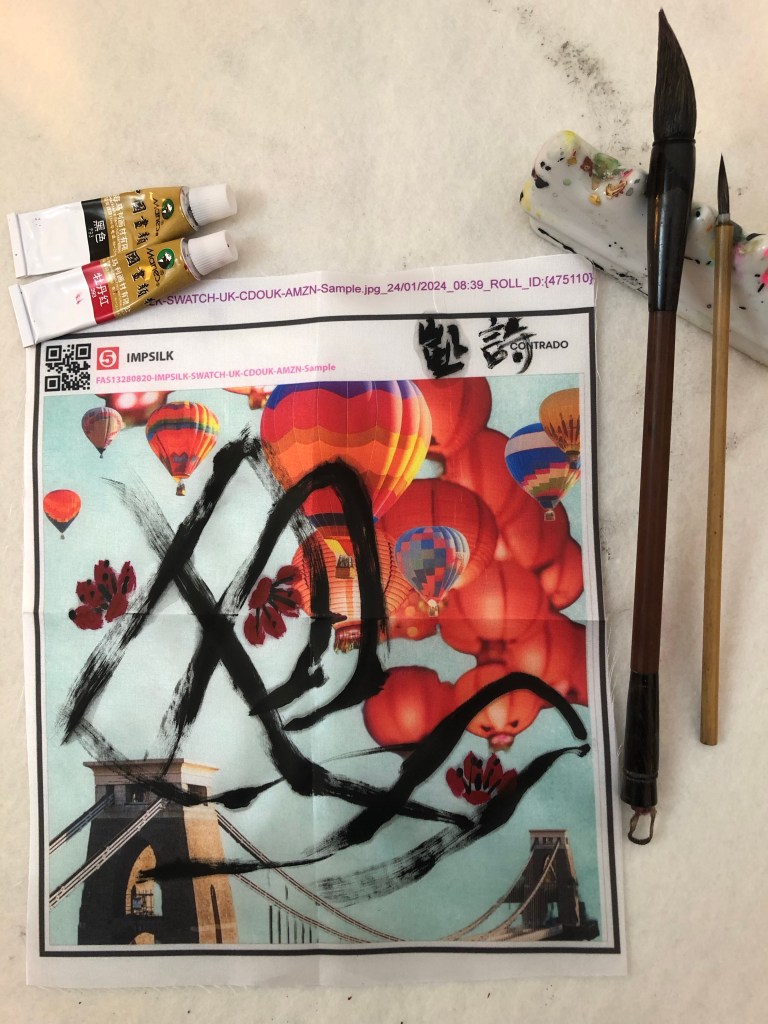
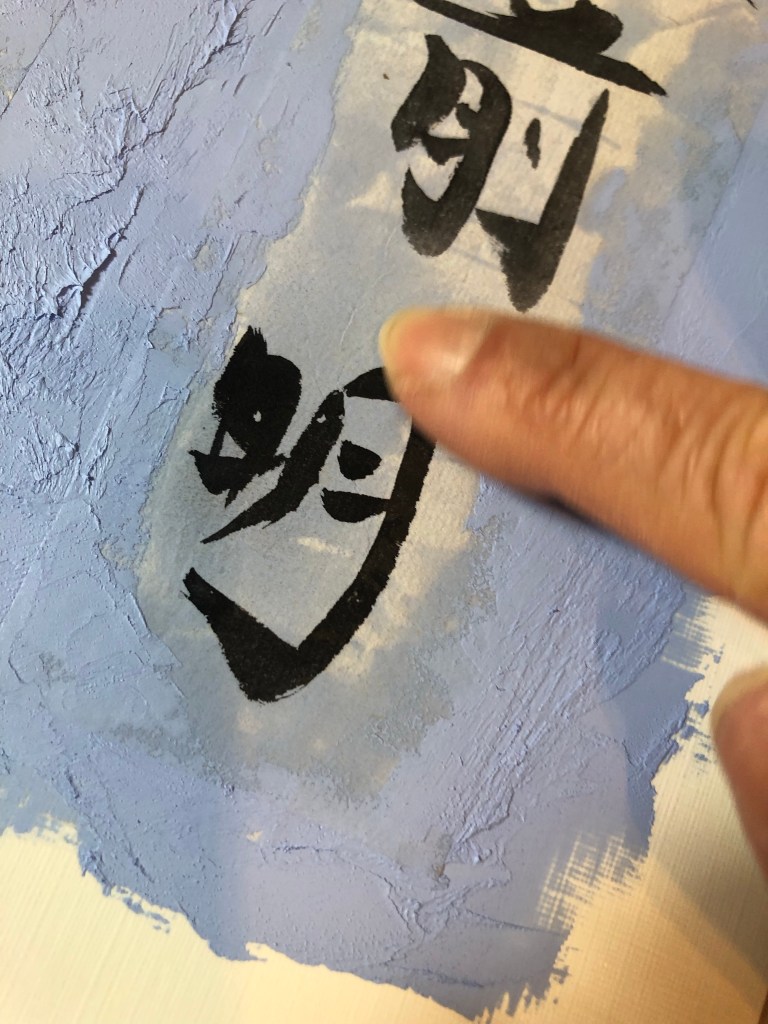
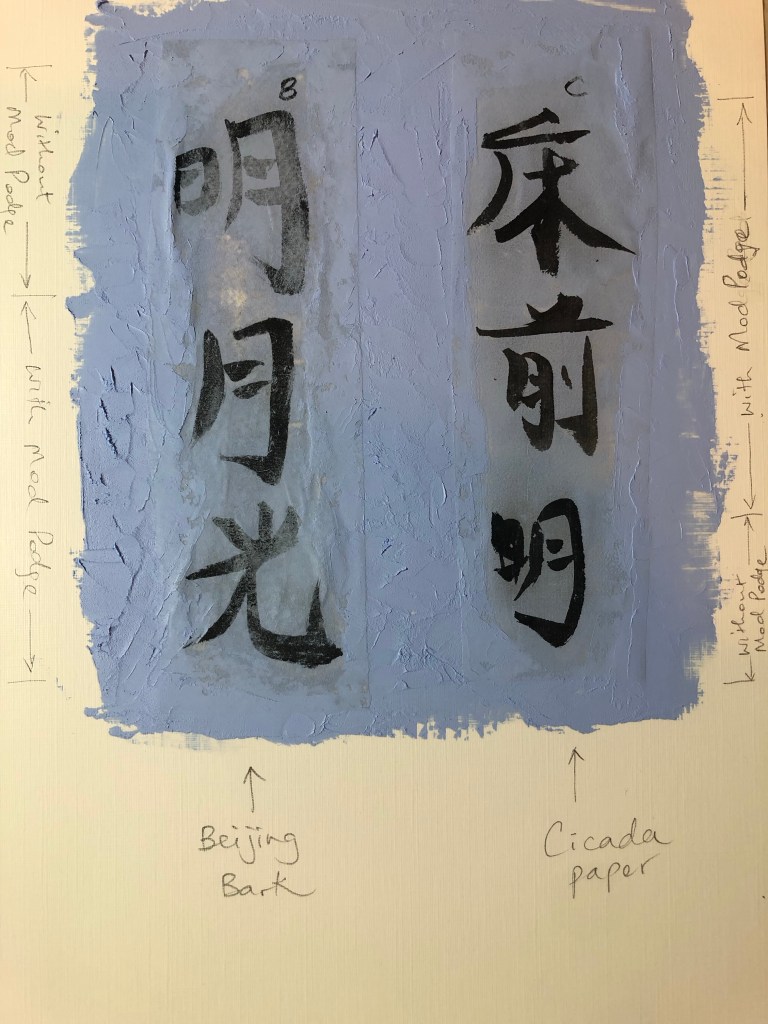
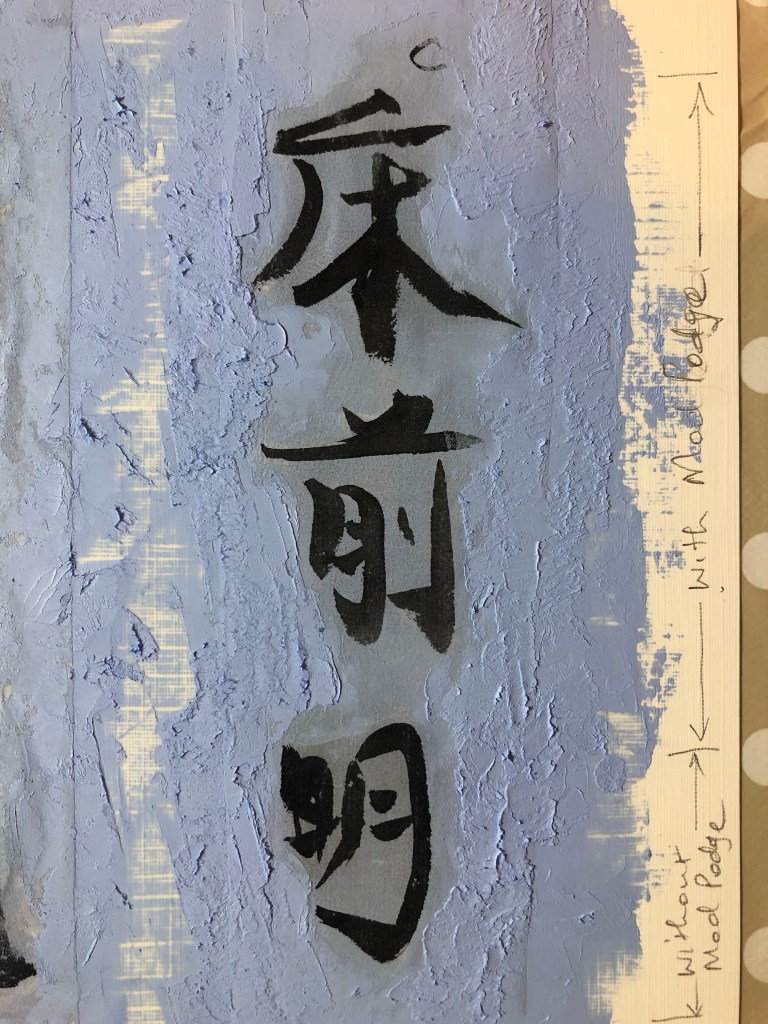
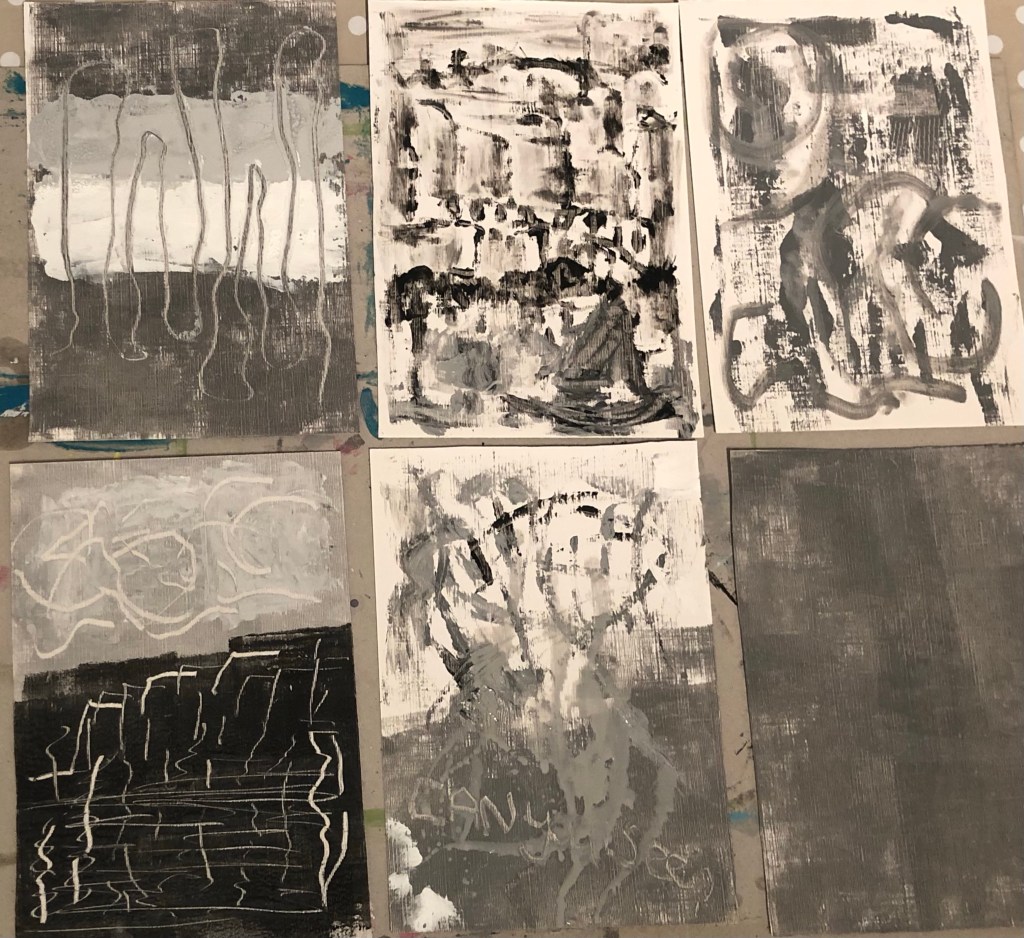
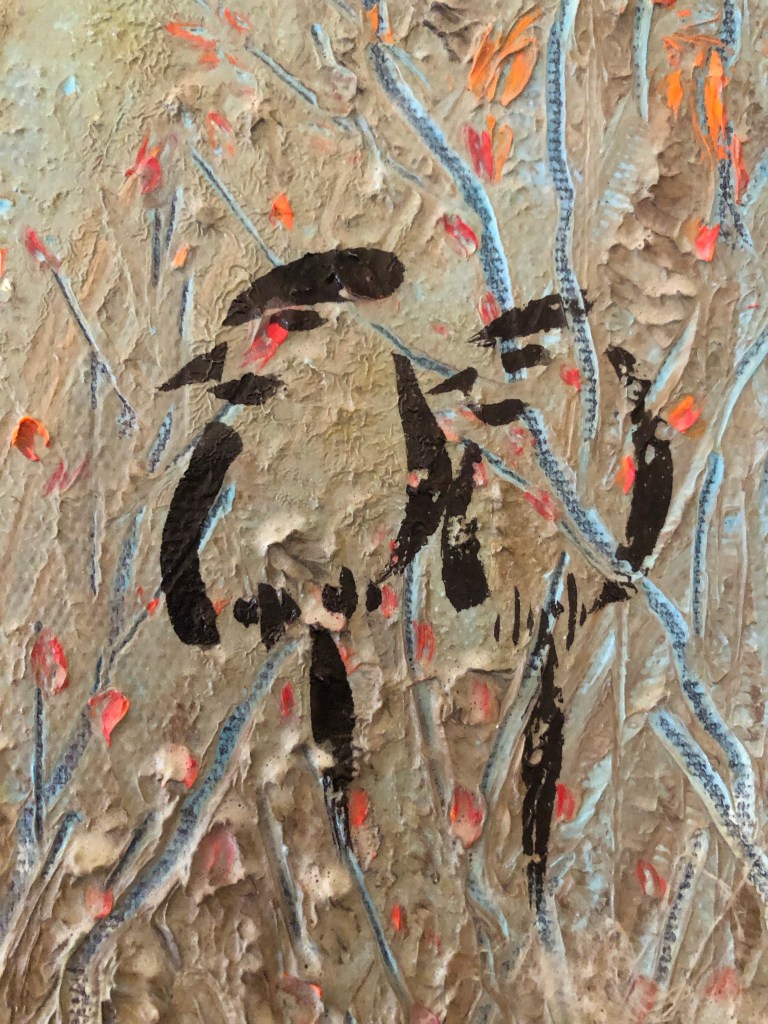
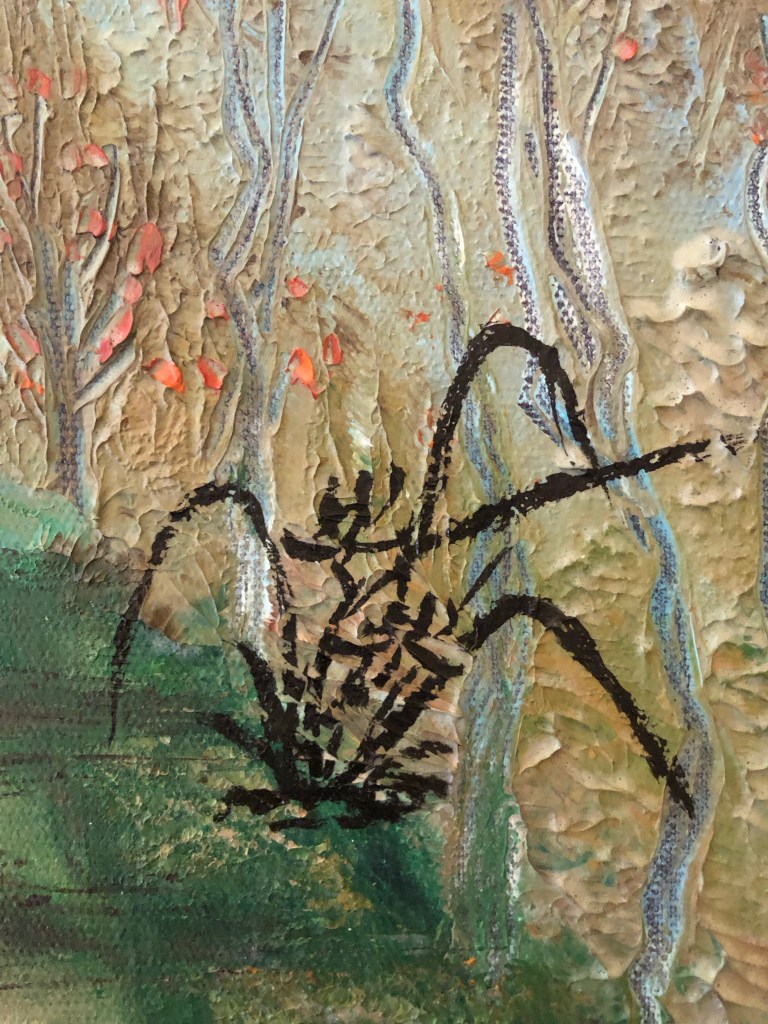
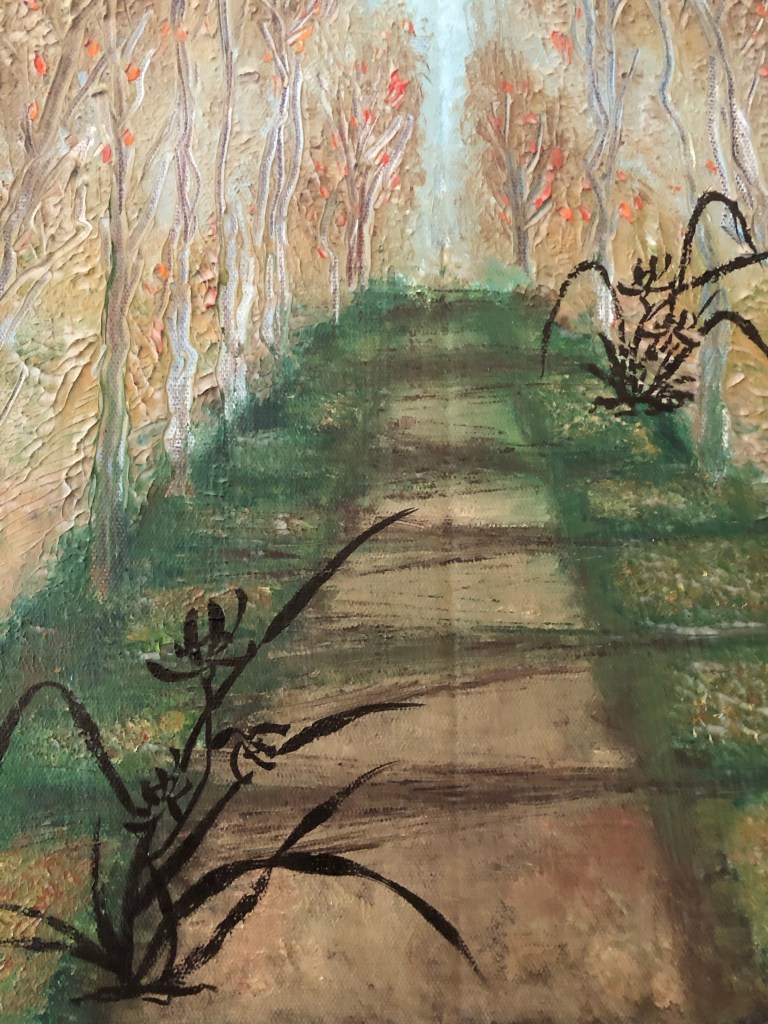
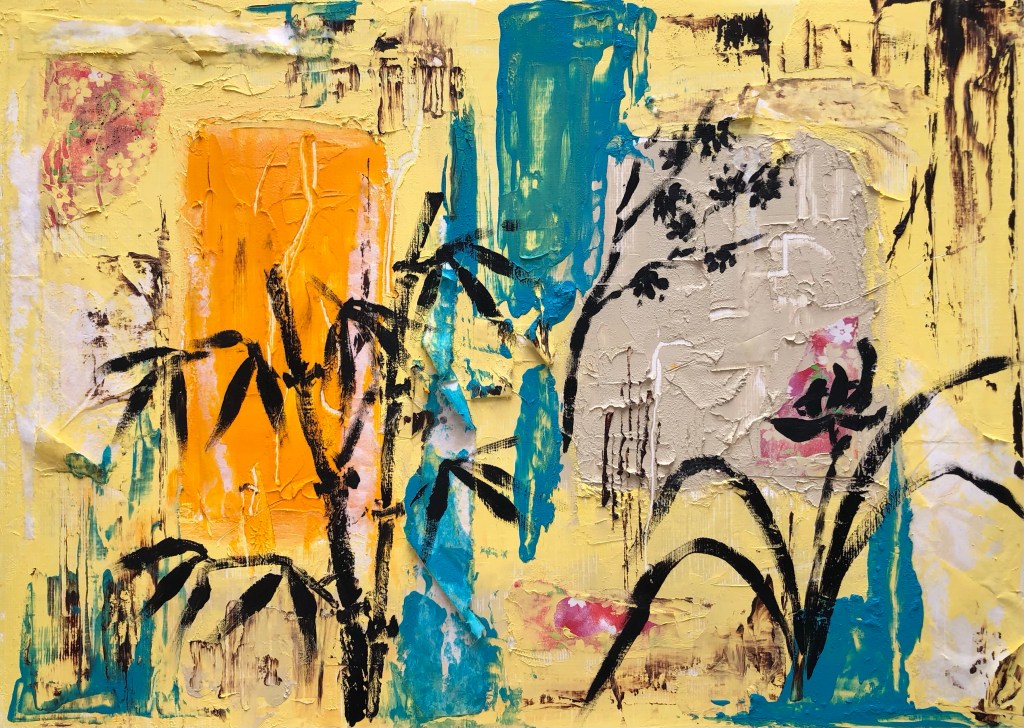
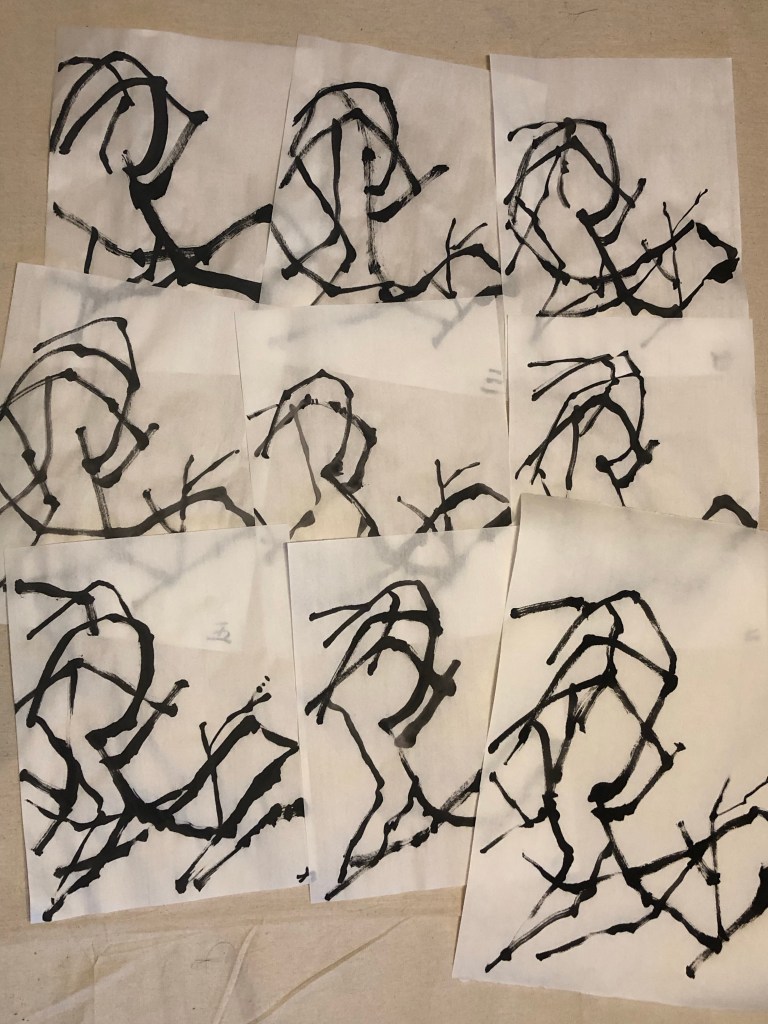
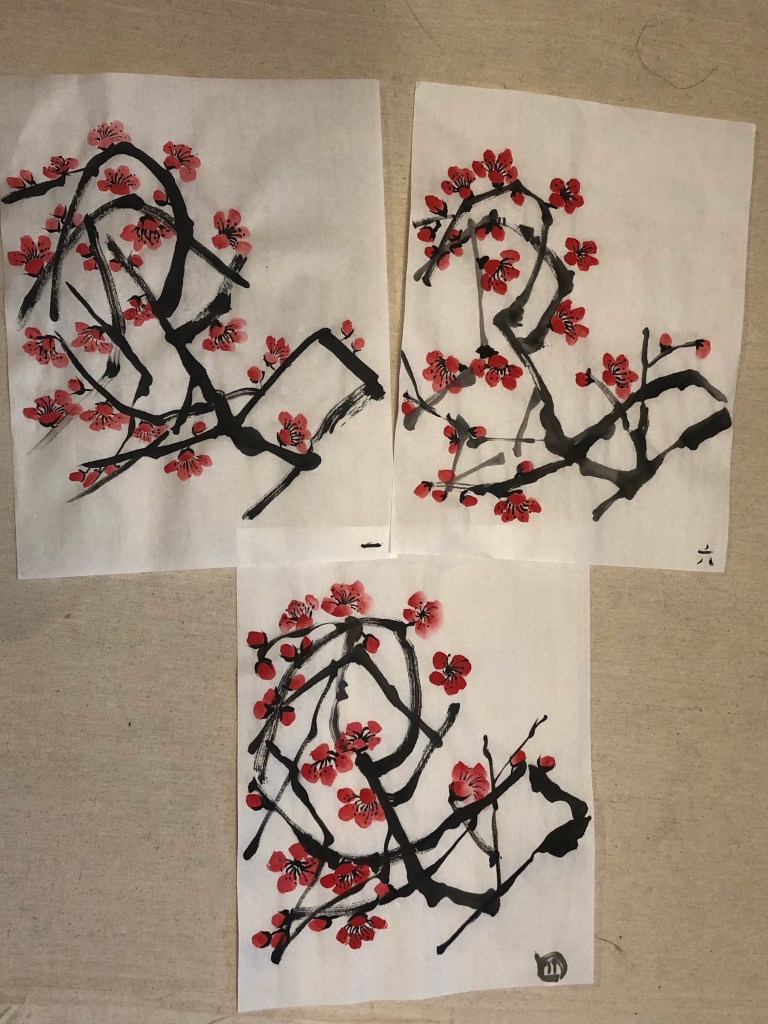
– I am considering making this work for the MA Interim Show in March 2024 if the rest of the process works according to plan. So I have been doing lots of practice Chinese brush paintings to test the techniques, composition and to choose the best paint brushes for the different parts of the intended painting – a plum blossom.  

.

.

LEARNING

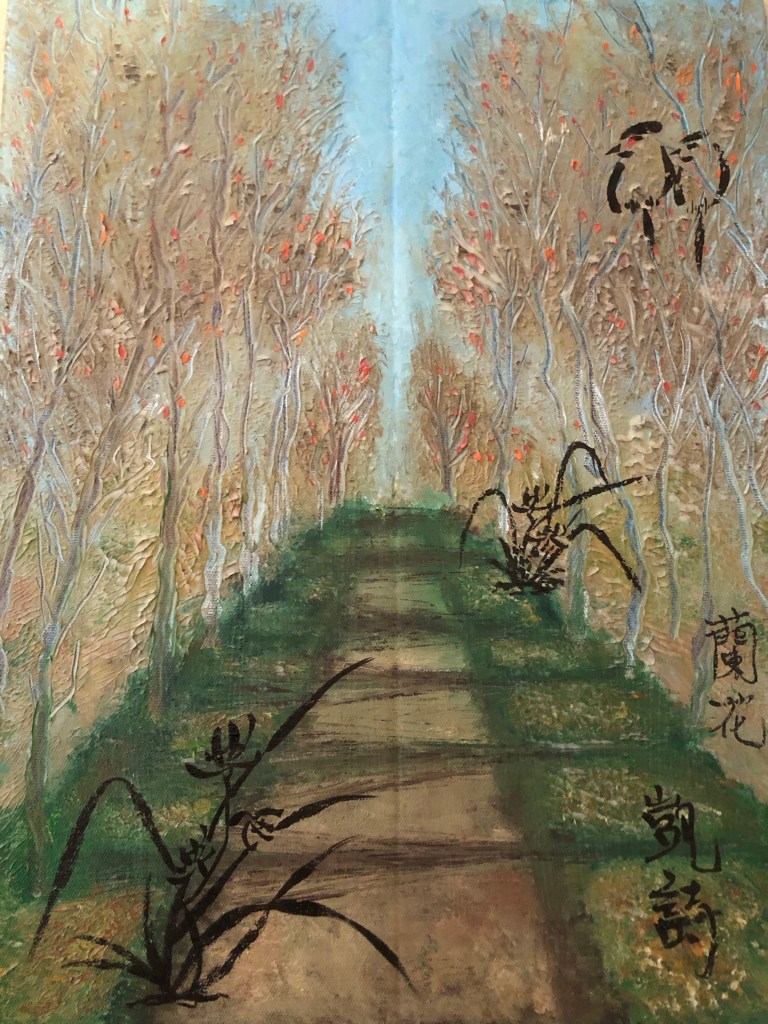
– I remain happy with the transcultural layering process that I started a year ago and I want to build on this line of enquiry with my latest learning to find the transcultural aesthetics that I have been searching for.

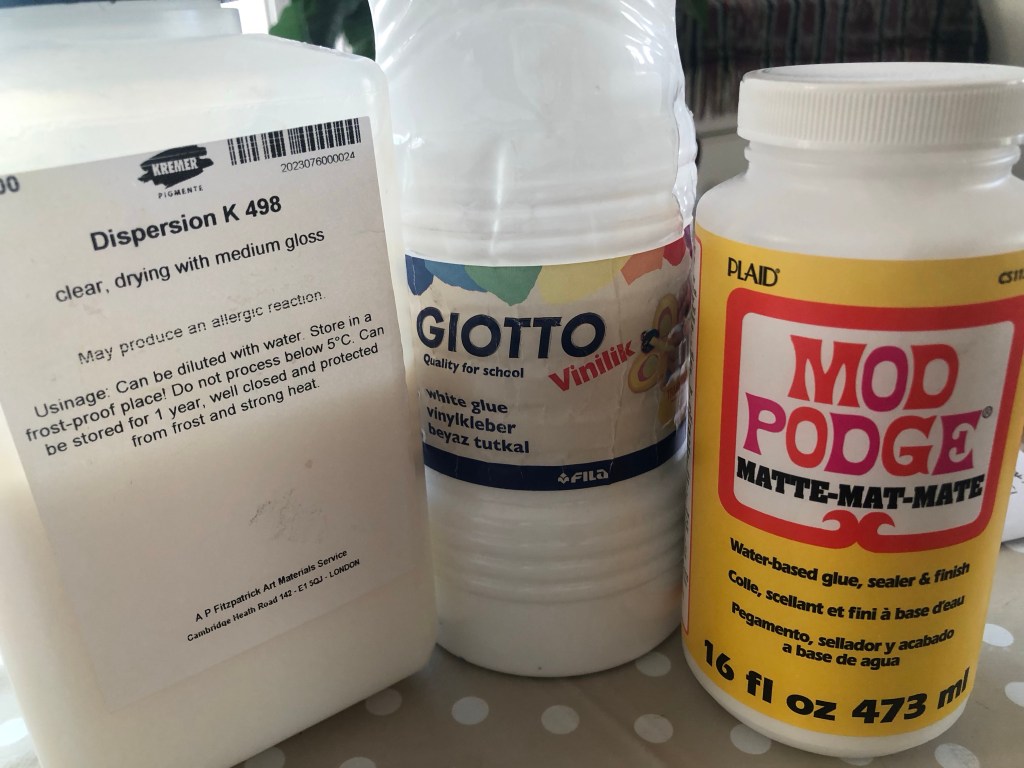
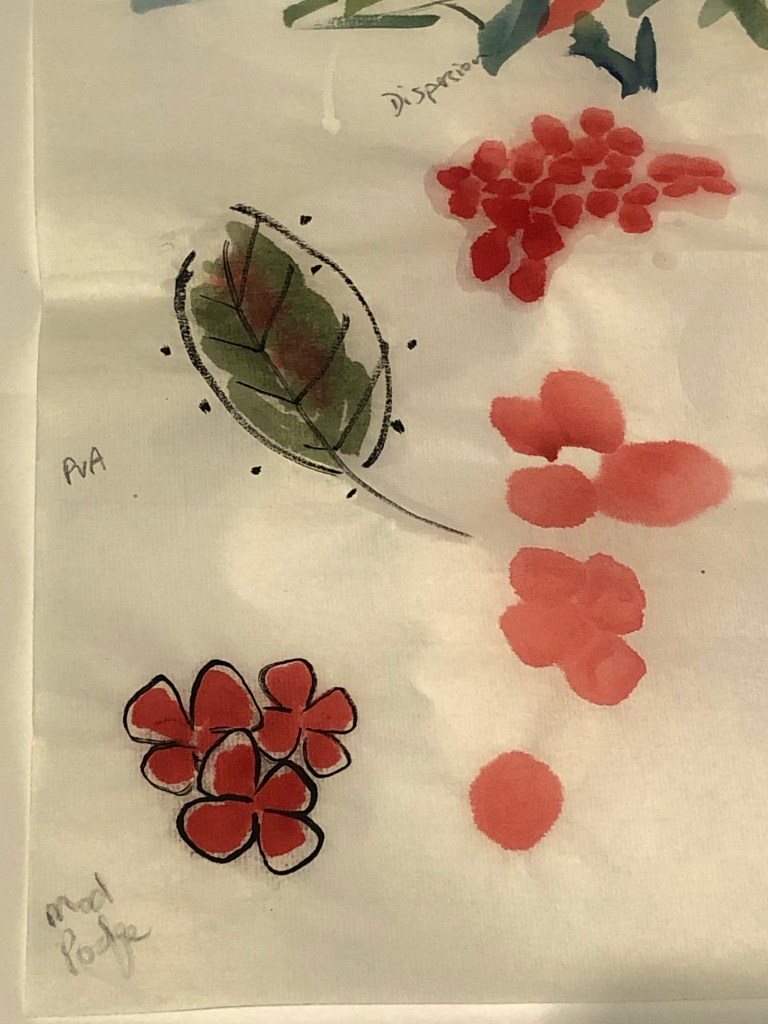
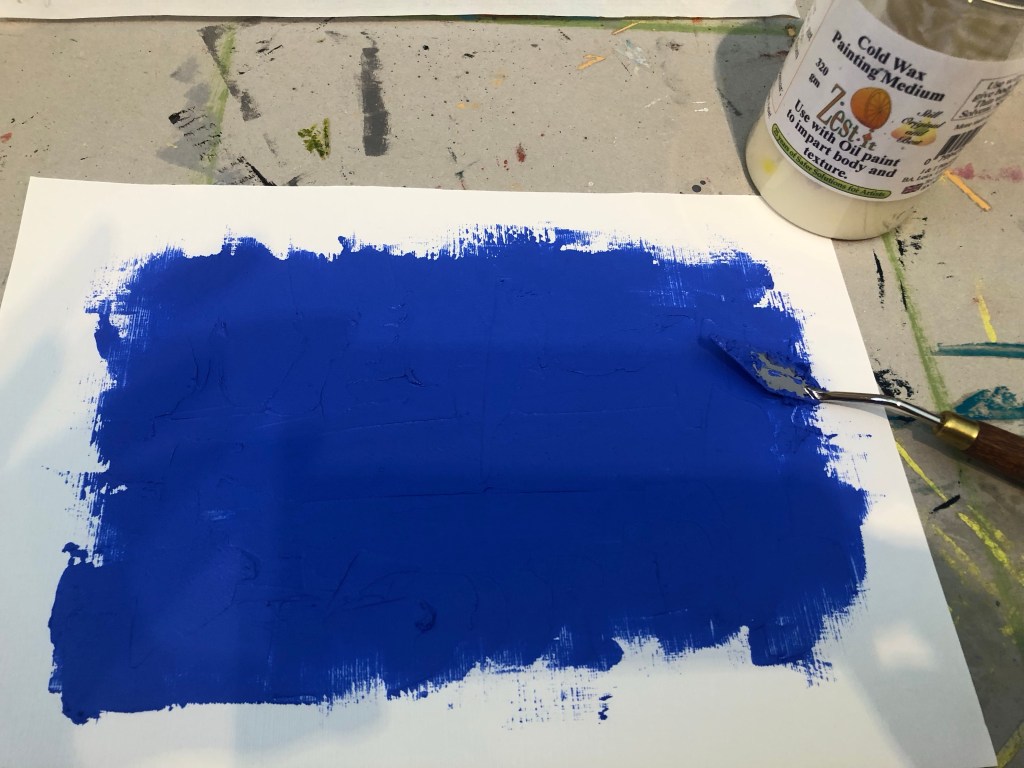
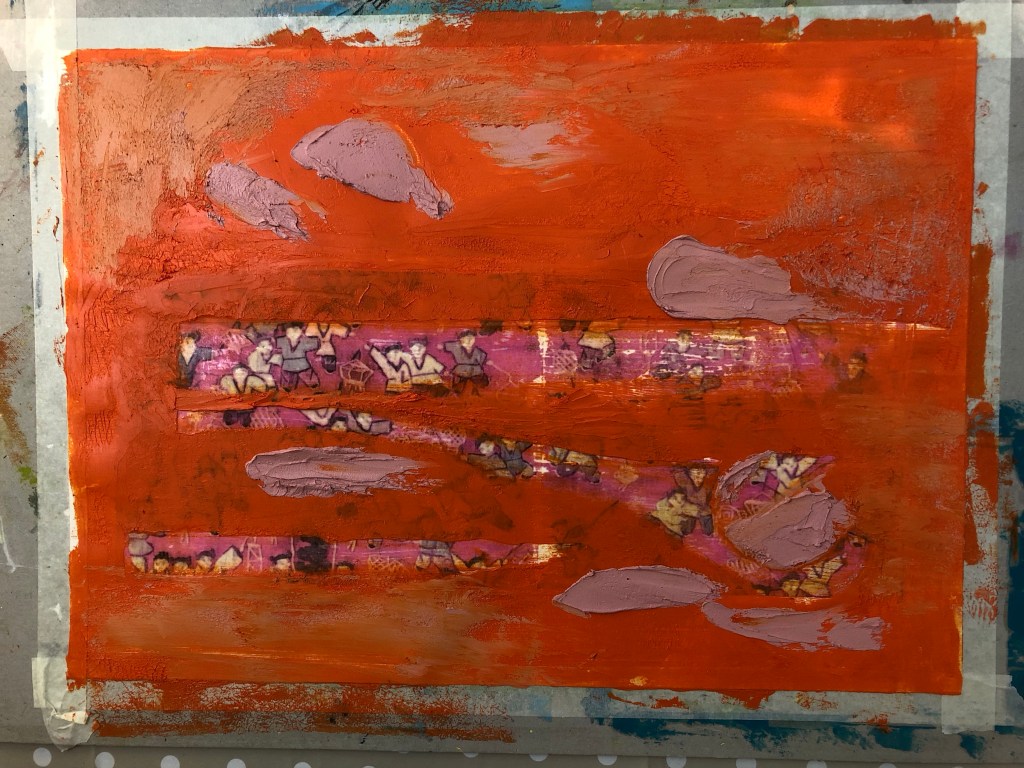
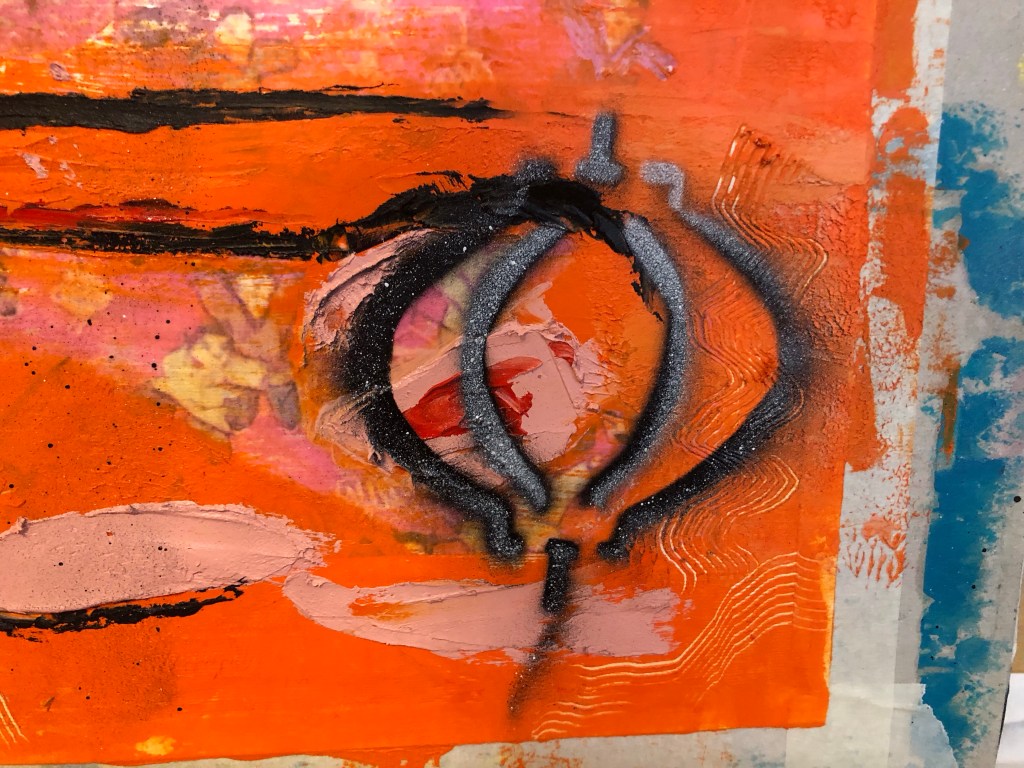
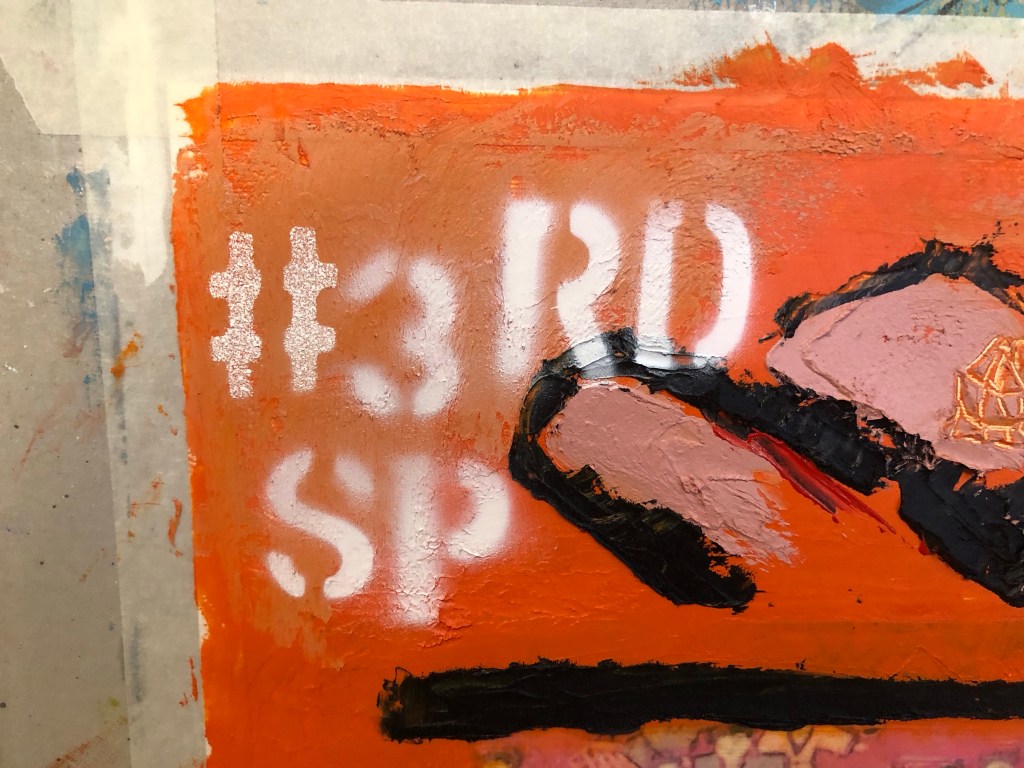
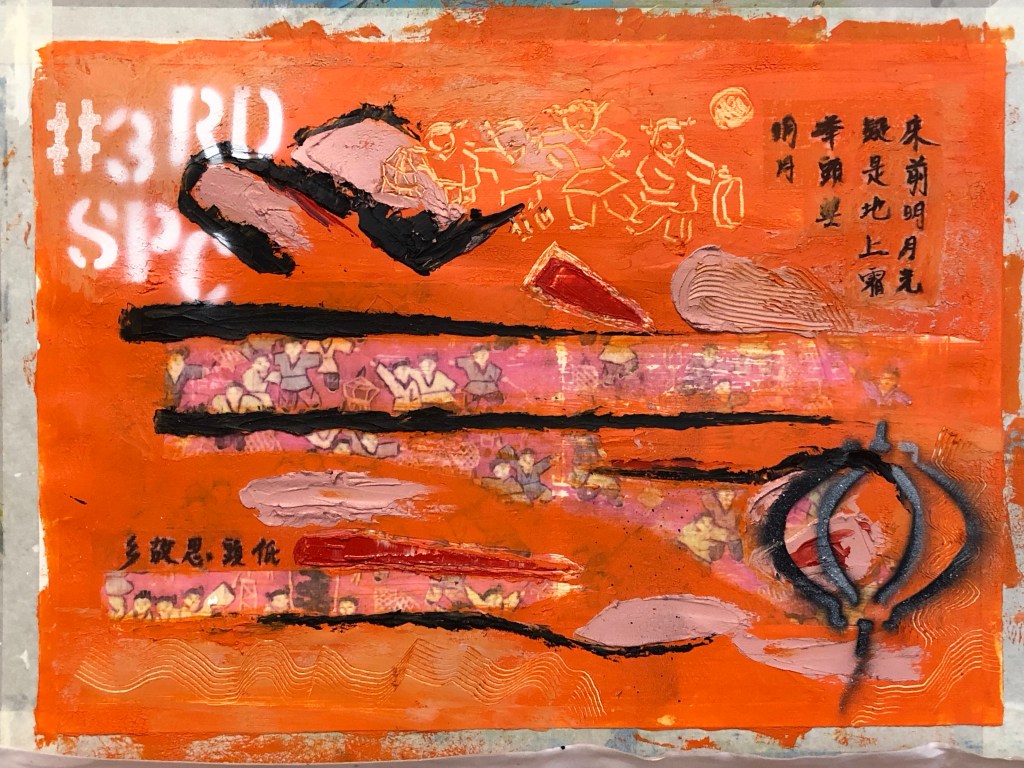
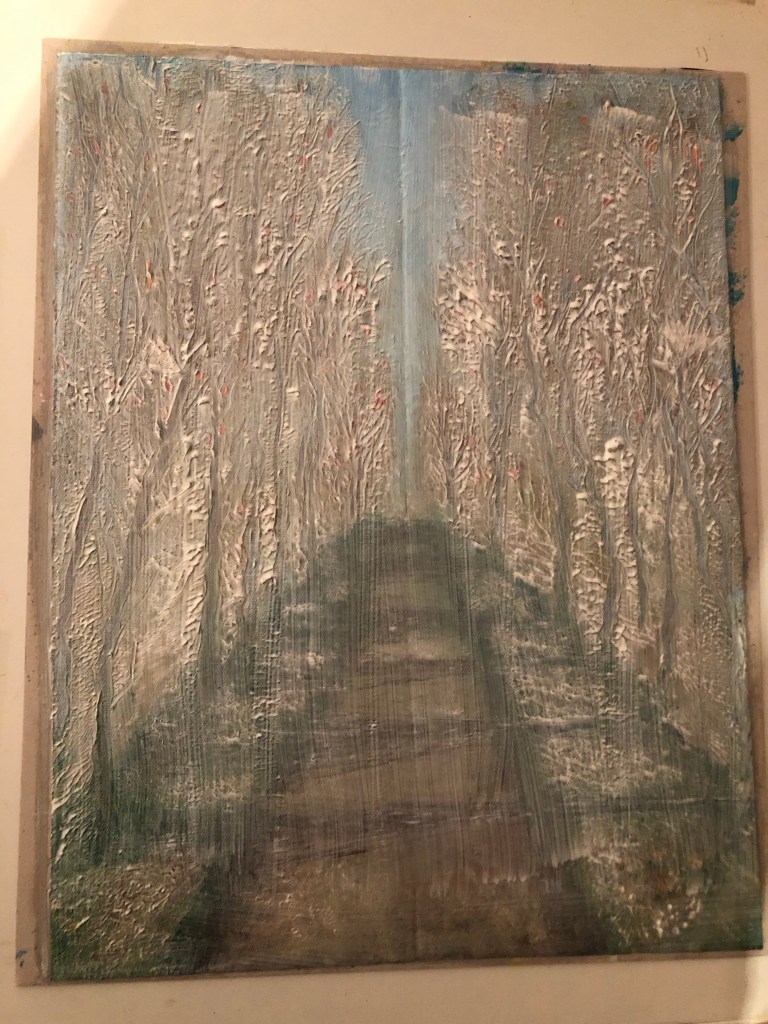
– Digital collages of a combination of found images and old family photos have a lot of potential for creating the transcultural aesthetics that I want. But I am looking for more than just a digital collage, so the collage can be the background on the canvas and then I can paint on top with Chinese brush painting (reflecting my heritage) and/or spray painting (reflecting my home city of Bristol which is famous for street art and there are plenty around for inspiration). Also, the oil and cold wax exploration that I have recently started can also be part of the layering process. I am mindful that the key is not to overdo the layers or overwhelm the image; I must remember to ‘leave room for the image to breathe’ creating tension on the canvas. My purpose for the different material explorations is to give myself options in my art making knowing what materials go together in order to create the desired aesthetical effects.

– I made a start in using my family photos and I feel I can do more with this approach, especially as the two strands of my practice start to mutually inform.

– I will proceed with this piece of work with the potential of using it in the MA Interim Show, so I need to think about how to hang the piece.

NEXT STEPS

– Order the chosen silk fabric and the printing of the digital collage.

– Decide on the final composition for the Chinese painting and practice on larger paper ready for the real thing.

– Think about ways to hang the piece.

– Make more work with using the family photos – a long term project.

MA Y1 U1: Research – Digital printing on fabric

BACKGROUND

Further to this blog:

https://eliza-rawlings.com/2023/10/10/ma-y1-u1-project-one-investigation-of-techniques-for-digital-printing-on-canvas/

I went onto the CSM campus to visit the Digital Printing Lab in January 2024 and discussed my requirements with a very helpful technician. Although the lab had great facilities, the only printer that could print onto silk is a UV printer. The effect would be very interesting but the size of the printable area is limited to around 77x33cm. The size is too small for a piece of work that I want to do for the MA interim show, but for other work, I could potentially use the UV printer and stitch together pieces of fabric which could be interesting.

So I have to turn to commercial companies for fabric printing. My MA colleagues suggested Contrado which also offers 40% student discount:

https://www.contrado.co.uk

I looked at their website and was delighted with the products and services they offer. The type of printing on silk of satin fabric that they do is Sublimation Printing. Sublimation printing explained:

https://www.contrado.co.uk/sublimation-fabric-printing

I proceeded onto finding the right fabric for this research experiment.

METHOD

I started off by ordering a collection of samples of all their materials and the relevant colour charts. Fabric samples are listed here:

https://www.contrado.co.uk/poly-satin?optionValue=3768

A large quantity of fabric samples and colour charts arrived and I sorted through them all to pick out four fabrics to proceed for testing. 

I ordered two poly satin and two natural silk materials. For the first print run experiment, I used a digital collage image that I had created previously and recently updated. One that I hope to use for the MA Interim show if this experiment works. 

The samples arrived and Contrado gave me a couple of extra prints of one of the materials which was a bonus. They all looked good and useable:

The idea is to do a Chinese brush painting of plum blossoms onto the fabric with the digital printing. The result of each experiment is show below:

Real 100% silk satin 85gsm
Silk sensation (poly) 90 gsm
Silk impression (poly) 41gsm
Mulberry silk Habotai 38gsm

REFLECTIONS

Reflecting on the results – the best outcome for me was the Mulberry silk Habotai 38gsm because:

– The material absorbency was just right. It absorbed the ink and contained the liquid well within the brush stroke. Whereas materials such as the Silk Impression (poly) was overly ‘sensitive’ in terms of absorbency; by this I meant it held onto the pigment but let the water from the ink spread beyond the painted area. This sensitivity would make it challenging to paint on because one has to carefully balance the water and pigment in the ink towards minimising the water which would make the brush flow (or glide) across the fabric difficult.

– The smoothness of the material surface, or fineness of the weave, was excellent. Meaning that the brush strokes did not pick up the weave pattern too much. Whereas Silk Sensation and Real Silk Satin both tended to show the weave too much. This would affect how the ‘flying white’ part of the brush stroke show up. For Flying White effect – see the tail end of the brush strokes in the Mulberry silk experiment where the canvas is partly shown in the stroke. The Flying White technique is important in Chinese brush painting and calligraphy because it shows the dynamism of the brush strokes.

– Area to be careful – the Mulberry silk Habotai material is quite transparent at 38gsm, so need to consider how to hang the final piece. E.g. to let light shine through or not.

LEARNING

– The key learning of the experiment is that Mulberry silk performed best and is the chosen material. I was delighted that I could find a suitable material with Contrado as they seem a good company to work with.

– I also learned a lot about how to analyse the results of Chinese brush painting on fabric – an area that is new to me.

NEXT STEPS

– Decide on the size of the piece to work on for the MA interim show and order the fabric.

– Complete the digital collage using Adobe Express – consider using old family photos.

– Practice painting the plum blossom and decide the final composition to go onto the fabric.

– Research and consider how to hang the piece, especially considering the transparency.

Research notes on the last point:

Ways to hang silk paintings –

http://www.visibleinvisible.com/pages/media/silk-paintings/silk-display.php

How to Hang a Tapestry 8 Ways

MA Y1 U1: Exploring media – Oil and cold wax – Part 7

BACKGROUND:

This is an experiment to complete one of the actions from an earlier blog – Exploring media – oil and cold wax Part 6. The action was to:

– Experiment with a barrier or masking fluid to prevent the oil from seeping into the Chinese brush painting images.

This experiment is required because the Xuan paper (rice paper) used for Chinese brush painting is very thin and absorbent, therefore if the paper was laid over materials such as oil in my transcultural layering work, the oil paint underneath would seep through and ruin the Chinese brush painting image as happened in Part 6 of this blog series.

METHOD:

The three barrier fluids chosen for this experiment were: Dispersion liquid; PVA glue and matte Mod Podge.

Some small images painted using Chinese ink were used for this experiment. The back of each image was painted with one type of the barrier fluids with one image left bare as ‘control’ for the experiment.

A paper canvas was painted with a mix of oil paint and cold wax:

The Chinese painted images were cut out and pressed onto the oil and cold wax. The images were pressed hard onto the painted canvas using a palette knife to robustly test the barrier performance.

Below is the result – an overall image followed by close-ups of each test area. 

Result: The best outcome was the Mod Podge.

REFLECTIONS

I am happy with the outcome of this experiment. This was a quick experiment but a very important one because, as shown in this blog series, it has been challenging to incorporate Chinese brush painting onto oil or oil and cold wax – the latter being my chosen ‘Western’ medium for my current series of transcultural style development work. The outcome of this experiment has helped me to find a viable way forward and I can now move onto developing colour palettes and aesthetics for my style knowing that I have found a way to combine the materials from different cultural origins without losing any material integrity.

LEARNING

The learning here is a straight forward one. Mod Podge worked well as a barrier fluid to protect the Chinese ink work before incorporating it into the oil and cold wax ‘collage’.

NEXT STEPS

Pick up from the previous post (Part 6) and resume the next actions from there. The immediate next action will be to research and develop colour palettes that can help to communicate my transcultural narrative.

ADDITIONAL EXPERIMENT

I was given two pieces of specialist Chinese painting paper by my Chinese art teacher. They are:

– Beijing bark paper, and

– Cicada wing paper (because it’s so thin that it resembles the wings of cicadas).

Both types of paper are of beautiful quality and feel very delicate. They are both very thin which would be ideal for what I’m looking for in my transcultural layering work. I.e. overlaying Chinese brush painting onto a more viscous medium such as oil.

I repeated the above experiment with these papers. I wrote some Chinese calligraphy characters on each sheet:

Then painted part of the image on the reverse side with Mod Podge as a barrier and leaving part of the image bare to compare:

Once the Mod Podge was dried. The two sheets were pressed onto a base layer of oil and cold wax. A palette knife was used for the edges, blending the paper with the oil paint to bury the edges. Then I used my finger to press the image into the oil:

Below is the outcome with the cicada paper performing well compared to the Beijing bark. The cicada paper appears to have an inbuilt barrier to protect the image, meaning that a barrier liquid would not be required as there was no perceivable difference whether Mod Podge was used.

Then more oil and cold wax was applied on top to blend in the image whilst avoiding the characters. Final result:

REFLECTIONS / LEARNING

Out of all the Chinese painting papers that I have tested in this series of exploration, the cicada paper was the best material for the purpose of my transcultural layering work involving Chinese brush painting and oil based medium.

Additionally, it was useful to discover that a barrier liquid (e.g. Mod Podge) would not be required with the cicada wing paper. This will help to reduce the process complexity.

NEXT STEPS

– Create a new piece of work that uses the new discovery with the cicada paper to refine the process and to learn more about the material.

– Source more cicada paper and find a long term supplier for this paper.

.

This experiment ends the series of blogs on ‘Exploring media – Oil and cold wax’.

MA Y1 U1: Exploring media – Oil and cold wax – Part 6

BACKGROUND

I want to use this experiment to explore the Next Steps that were identified in Exploring Media – Oil and Cold Wax Part 5.

https://eliza-rawlings.com/2023/12/24/ma-y1-u1-exploring-oil-and-cold-wax-part-5/

The actions were to:

-Try out more Chinese brush paint collage onto oil and cold wax to refine this part of the process.

-Try exposing a larger area of the background image to see if that can work with the abstraction approach on the top layer. Experiment to find the right balance between revealing the base layer image without losing the sense of abstraction on the top layer.

-Try spray painting on top of the oil and cold wax surface – try when wet and then when dried.

Finished work for Part 6:

Mixed media on paper, A3

METHOD

A printed photo image of a tapestry that was gifted to me by my brother many years ago was used as the based image for this piece. The image was transferred onto a paper canvas using dispersion liquid. The paper used was 250 gsm oil paper.

After the dispersion liquid dried, the printed image was rubbed off with a wet sponge to reveal the transferred image on the canvas. This was the first time a paper canvas (as opposed to a cotton canvas) was used in this series of experiments and it was clear that the paper canvas was not robust enough for the process. See below image for damage to paper. However, there was sufficient integrity in the paper canvas to continue the piece. I was hoping that a thick layer of oil and cold wax would hide the damaged areas. There was also excessive buckling on the paper canvas.

Recalling my disappointment with the colour palette that I chose for Part 5 (pink and grey), I decided to research into abstract paintings that I like to learn from the colours used. One of my favourite abstract artists is Lee Krasner and below is the painting that I decided to study and learn from in terms of the colour palette used.

Desert Moon (1955):

A layer of oil and cold wax was then applied to the canvas:

Areas were scraped off to reveal the base tapestry image. Learning from Part 5, I wanted to reveal a larger area so that it was clear what the base image was about. Then additional oil and cold wax colours were added:

For the Chinese brush calligraphy, I chose a delicate silk fabric as a substrate that was almost transparent because I wanted the substrate to become as invisible as possible.

After writing the Chinese calligraphy onto silk, it was cut out and carefully pressed onto the oil and cold wax layer.

A small palette knife was used to press the silk into the oil and cold wax, taking care to avoid pressing the areas of the calligraphy characters which was challenging due to the complex shape of the characters. The yellow circle shows where part of the character was pressed into the oil and cold wax, partly obscuring the writing.

Additional marks were made – some were painted on and some were scratched off. The tapestry image was about children playing with lanterns and I have a lantern stencil that was made for previous work. So I wanted to experiment with spray painting onto wet oil and cold wax to see the effect.

Further spray painting was done – the phrase #3RD SP (for third space) was sprayed onto a dryer corner of the painting. All spray paint used were Montana GOLD 312g aerosol cans as popularly used by street artists:

Finished work with border tidied up:

REFLECTIONS

I am happy with:

– The colour palette. I am much happier with this painting than the previous one in Part 5. A more considered approach in selecting the colour palette paid off here.

– The experiment with using an almost transparent substrate for the Chinese brush art worked well. The pieces (there were two in total) adhered well to the painted surface. Although the substrate was not completely invisible, it was acceptable as a solution.

– The scratched mark making especially the part at the top to echo the revealed based image of the children playing with lanterns.

– The overall look of the spray painting, especially the words – they added a contemporary feel to the piece which was what I was looking for.

– Feeling more confident using oil and cold wax as a medium.

I am not so happy with:

– The paper canvas, it was not robust enough. Although the damage by the image transfer process was covered up with oil and cold wax, it was clear that this would be the wrong material to use for this process.

– The spray painting of the lantern – it was sprayed onto very wet oil and cold wax. The outcome was not satisfactory – it felt and looked ‘gooey’ and not the intended effect. I believe this was partly due to my reluctance to place the stencil close to the wet oil paint as I didn’t want the back of the stencil to pick up the oil paint, causing the spray paint to loosely disperse around the stencilled image.

– Although I was happier with the colour palette, I felt there was more that could be done to add more complexity to the palette to increase depth to the piece.

General comment: the Chinese calligraphy is a famous ancient Chinese poem about being homesick. It is one of the few Chinese poems that I know as most children growing up in Hong Kong in my era were made to learn it, partly because it is a good poem and very easy to remember. Going forward, I feel that if I were to use more Chinese calligraphy then I should learn more about Chinese poetry so that I can use a wider variety of content in this respect. It will also help me to understand more about my Chinese heritage.

Other thoughts that came to me some time after completing this painting:

– Throughout the making process, my mind kept going back to celebrating the Mid Autumn Festival when I was a child in Hong Kong. The highlight as children was to be given a lantern each to play with. The choosing and buying of the lantern in preparation was always a source of excitement. The lanterns were lit with small candles. The children would use a long stick as handle for the lantern and go around the neighbourhood exploring with their lanterns, just like the children in my painting. The Mid Autumn Festival celebrated the fullest moon of the year and celebrations would only begin after dark when the full moon came out. Since we were not usually allowed out at night, it made the Festival especially popular with children. At times a lantern would catch fire which added much excitement. There would be lots of fruit and snacks laid out that were specific for the festival. I remember one year when we were older children (over ten years old), my brother and I went to a local park, sat on the swings and chatted all evening. It was when my family was going through a difficult period and to share that moment with him was very special, especially when we ended up spending most of the rest of our lives living in different countries. He gave me the children’s tapestry that I used for this painting which evoked all those memories while making this piece of work.

LEARNING

– More work is required to develop my sense in choosing an appropriate colour palette for the piece. This is increasingly important because my work is about storytelling as well as narrative and I believe having an appropriate colour palette helps to tell a story. So more research and experiments should be done in this respect.

– The silk substrate worked well for the Chinese calligraphy. However, I know there is a wide range of other delicate Chinese substrates and I will experiment with different materials to find the optimum.

– Layering the Chinese substrate onto oil is a risky process – as seen in the image with the yellow circle highlighting the part obscuring of the brush painting if pressed too much into the oil. To help with this, further experiments are required to improve this process. E.g. paint a barrier layer, such as a masking fluid that dries clear, onto the back of the Chinese brush painting or calligraphy to shield the image from the oil seeping in from underneath.

– Spray painting, especially words, adds a contemporary feel to the image which is a style that I want to incorporate into my work. This is relevant to me because I take much inspiration from the extensive street art scene in my home city of Bristol where many famous street artists work or have worked.

– Using the tapestry image evoked many memories, perhaps I could explore that more.

NEXT STEPS

– Research into colour palettes for the type of stories that I want to tell. Build confidence in this area.

– Continue to build experience and explore using oil and cold wax.

– Experiment with other transparent Chinese substrate materials to find one that is as close to invisible as possible when layered onto oil.

– Experiment with a barrier or masking fluid to prevent the oil from seeping into the Chinese brush painting images.

– Experiment with more spray painting – be bold and push boundaries.

– Ongoing learning – research into Chinese poetry to find more poems that resonate with me to use in future work.

– Explore the evoked memories.

ADDITIONAL WORK

After visiting the exhibition of Ofelia Rodriguez again at Spike Island in Bristol, I was inspired by the way she used fabric as a border to her paintings.

This gave me the idea to try that with my work, especially to use Chinese imagery border for a recent piece of work to add to the transcultural narrative.

I started with some patterned paper that I had to make a collage frame. But I was not happy with the effect. It seemed too busy and rather random as an idea.

I then returned to the original tapestry that I used as the base image for the painting. It was a tapestry that was gifted to me by my brother many years ago.

Image to show the border of the tapestry

It is a typical border for small scale tapestries of this type. Then images of the border were printed and cut out to create a collage border for the painting:

Final finished work:

Mixed media on paper, 54 x 41.5 cm.

REFLECTIONS

I am very happy with the outcome of this experiment inspired by Rodrigues. It has completed the painting for me and added a more transcultural feel alongside the painted images such as the spray painted words.

To improve this approach, I would spray paint the # words to partly cover the tapestry image frame. I think that would increase the contemporary feel for the piece juxtaposing the traditional Chinese tapestry border.

MA Y1 U1: Exploring media – Oil and cold wax – Part 5

BACKGROUND

Continuing from Part 4:

MA Y1 U1: Exploring oil and cold wax – Part 4

I watched the last session of the online course with St Ives Painting School on exploring oil and cold wax which was useful in giving me more ideas to try. I want to then respond to the ‘next steps’ from Part 4 in this research experiment.

Finished work:

METHOD

An A2 sized inkjet printed poster of a night time neon street signs scene of Hong Kong was chosen as the background of the piece. Dispersion liquid was used to transfer the image onto an A1 primed board canvas.

As the piece dried, I could see the canvas board was warped by the process – something to note.

Below is the transferred image. I turned it upside down because I wanted a specific sign to appear at the point shown by the yellow arrow indicated:

Axes were drawn in chalk to mark out the approximate plan for the composition. Also, some pencil marks were made on the edge of the canvas to indicate where a few of the specific neon signs were located that I planned to reveal later.

To complement the pink and dark colours of the background, I chose to use shades of grey and pink for the paint and cold wax coverage for the piece. So a palette of the different shades were mixed starting with red, black and white.

Since this was a practice research experiment on semi-abstraction with oil and cold wax, I started with various abstract shapes in the chosen colour palette. Then after using solvent to soften an area of paint and wax, I scraped off an area to reveal a specific neon sign according to the position marking that were made earlier:

Various tools were used to scrap off paint as mark making. Also, using a small palette knife with a pointed end, Chinese calligraphy characters (last line of a famous ancient Chinese poem) were scraped into the work – this was an experiment to simulate a Chinese paint brush using a pointed palette knife:

Various tools were used to add more marks. Shapes of the Bristol Harbour Horn Bridge were put in because I liked the effect from a previous experiment. Pigment powder were scraped from a pigment bar to create a dusting effect. More areas of paint were removed to reveal the neon signs underneath – the later ones were just scraped off with a card or palette knife without the need for solvent which was unnecessary. Other lines from the ancient Chinese poem were written in Chinese ink on Xuen (rice) paper, then cut out and pressed onto the paint and cold wax on various areas of the painting.

Finished work: Size A1, mixed media.

REFLECTIONS

I enjoyed the experiment and it was very helpful. Below are what I was and was not happy with.

I was happy with:

-The discovery that using Xuan paper to add Chinese brush painting or calligraphy worked very well. This is because the thinness of the Xuan paper was almost transparent when pressed onto the oil paint, so that it almost appears as though the calligraphy was on the oil surface. I would like to find more robust yet thinner materials (maybe silk or other paper of some kind) for this technique because the Xuan paper is delicate and could be prone to damage in the process. Since the paper is still partially visible and the temptation is to keep burying it into the paint and therefore risk damage. Hence an even thinner but more robust material would be better.

-Using the small palette knife to simulate a Chinese paint brush was successful but the effect is not as authentic as using the Xuan paper. However, I can see that the palette knife technique has its place if a semi-authentic effect was needed.

-Scarping the paint and wax off to reveal the background image worked well and the position markings on the side of the canvas were essential.

-I felt confident in manipulating the paint and cold wax materials, both in applying and mark making using tools. I continue to enjoy using these materials and can see more potential.

-The pigment powder sprinkling method worked well.

I was not happy with:

-The overall painting – I do not like it. 

-There are too many neatly laid out symbols, hence it feels twee. I need to be more gestural in the mark making if I want to use abstraction as a form of expression. This requires more experimentation.

-The pink and grey palette added to the tweeness. So not satisfied with that.

-The vibrant neon-signed background did not get exposed sufficiently hence losing the energy that I wanted to bring into the piece with that image. Scraping small areas to reveal the symbols worked technically, but I feel larger areas needed to be revealed to make the background a true part of the painting.

LEARNING

-Out of all the different experiments carried out in this practice-based research series of work to incorporate Chinese brush art into oil paint, I believe this (using Xuan paper) was the most successful and I was happy with the outcome. So I will explore using a collage technique rather than brush paint ink onto oil. The next step will be to find the optimum material which would perform even better than Xuan paper. Ideally to find a selection of materials so I have some options to choose from.

-Oil paint and cold wax are still materials that I want to explore further for developing my style because I feel it provides a good based for semi-abstraction work that I want to explore. I can make abstract gestural and textural marks as well as use tools to depict symbols. Also it forms a good base for any collage work.

-Expose larger areas of the background image if the background is meant to be a key part of the work.

-One area that I have not experimented with yet is to spray paint onto oil and cold wax to see how that performs. I want to have the option to add street art onto my work.

NEXT STEPS

-Try out more Chinese brush paint collage onto oil and cold wax to refine this part of the process.

-Try exposing a larger area of the background image to see if that can work with the abstraction approach on the top layer. Experiment to find the right balance between revealing the base layer image without losing the sense of abstraction on the top layer.

-Try spray painting on top of the oil and cold wax surface – try when wet and then when dried.

ADDITIONAL EXPERIMENT

After the painting has dried, I spray painted the phrase ‘#3RD SPACE’ using a stencil onto the dried oil paint and cold wax. It worked well and I’m pleased that spray paint is an additional material that I can use here.

MA Y1 U1: Exploring media – Oil and cold wax – Part 3

BACKGROUND

This is Part 3 of my blog series on exploring oil and cold wax. I’m exploring this combination of medium because I have always liked the effect this combination produces and I want to explore building it into my practice. Through this exploration, I want to find ways to examine my third space from my subconscious through abstraction.

METHOD

Despite doing various practical experiments as well as online research about working with oil and cold wax. I reached a stage where I was looking for some more formal guidance. So I attended a series of online webinars ran by St Ives School of Painting.

Session 1 was mainly to experiment with making marks with different tools using a limited palette of black, white and greys.

I made six small paintings and below is my favourite:

Paint palette with 50:50 mix of oil and cold wax:

I tried various tools such as palette knifes and pointed scrapers. The new ones for me were the tools typically used for scraping clay for ceramic work – they proved to be very effective at scraping oil and wax mix as one would expect.

The six images created during the session:

REFLECTIONS

I have enjoyed the session and I was pleased with what I have done so far. Nothing is really new but taking time to just focus on mark making with the medium was good ‘returning to basic’ work that I needed here. It gave me an opportunity to reset my thinking and to give myself time. Rather than feeling I had to produce a finished piece of work because I should be beyond the basics, it was good to just explore without giving myself pressure which was what I wanted to do.

Also, in the past, when I had wanted to experiment with oil and cold wax, I was advised against it by a previous painting tutor because it would change or flatten the oil paint luminosity. Then recently at a group crit when I was asked why I wanted to use oil and cold wax, I couldn’t really come up with a reason apart from ‘I like it; I like the texture and the effect it create’ which seemed inadequate. So I felt I couldn’t justify using the combined medium. But there’s something about it that kept drawing me back so right now I feel very excited that I’m continuing with the exploration and I am doing the webinars.

LEARNING

The technical learning so far is limited after just one session, I plan to expand on this after I have done more of the course.

From a personal learning perspective – I am just excited that I am doing this despite earlier discouragement and I no longer feel the need to justify it. I feel excited that this could be a way for me to use abstraction to express my transculturalism because of the layering and scraping then revealing nature of the medium – it appears I have just justified using this combined medium!

NEXT STEPS

Attend session 2 of the webinar series.

MA Y1 U1: Exploring media – Chinese ink on oil experiment

BACKGROUND

In exploring transcultural art and my own style, I have been looking for ways to do Chinese brush painting with ink on top of oil paint. I am hoping that through these experiments, I can find ways to combine eastern and western art materials in my work whilst maintaining the characteristics of both genre.

Here is an earlier experiment and this blog is a response to it:

MA YI UI: Exploring oil and cold wax

METHOD

In this experiment, I took an old oil painting that had a range of textures and I applied a layer of clear gesso on top of the dried oil paint to creat a surface for Chinese brush painting to see if that would work.

A thick layer of clear gesso was applied to an oil painting.
It was left to dry overnight.

After the gesso has dried, I painted various images using a Chinese brush and ink on different parts of the canvas to test out how the brush and ink performed on different textures.

A Chinese orchid was painted in the least textured area of the painting. Here the outcome was compared to a similar exercise on dried oil without gesso (painting on the left):

Two birds were painted in the tree branches which was the most textured area on the painting:

An orchid was painted in the medium textured area in the mid ground of the painting:

Some Chinese calligraphy was tested using different size brushes:

REFLECTIONS

For me, a smooth surface such as silk or Xuan/rice paper is required for Chinese brush painting to be at its best. So that the brush strokes can glide across the page. I painted the Chinese orchids in the experiment because to paint the long and bendy leaves in one stroke required a continuous smooth movement whilst slightly lifting and turning the brush. Similar to calligraphy. In the heavily textured area in the tree branches, I painted two birds because I knew that long brush strokes wouldn’t stand a chance in that area, hence the short and relatively straight strokes for the simplified birds. Since this is mainly an experiment, the technical outcomes are captured under the LEARNING section.

I will note here my reflections about how I felt during the process. I felt excited that there was another avenue to explore as I really wanted to find a way to combine on the same painting the Chinese and western materials. However, this experiment showed that although I have made progress, I have not found the ideal way to achieve my objective of combining the two different materials. Perhaps the challenges I have had is also a metaphor for my lived experience in navigating the two cultures in daily lives.

Another thought was that I should definitely research more on other transcultural artists’ work as I expect someone else would have done this before me.

LEARNING

– As expected, the smoother texture area (the large orchid) performed the best. In comparison to the earlier experiment of painting on oil without the gesso layer – it was clear that the one with gesso performed much better enabling the Chinese paint brush to glide more easily.

– The heavier textured areas had too much ‘pitting’ and even with a brush heavily loaded with ink (like with the bird on the left), it was hard to achieve a smooth stroke. Hence I don’t believe this combination of material would work satisfactorily for me. If I wanted to do Chinese style brush strokes on such a texture then I’m better off using oil on a soft brush, the oil paint would fill the pits more effectively even if not completely.

– The two sets of calligraphy were done with brushes of different size, the lower set was with a thicker brush and that comes across better. The thinner brush did not have the strength to deposit sufficient ink on the oil surface.

– There is further refinement I could do to smooth the oil surface such as sanding and more layers of gesso.

NEXT STEPS

– Research other transcultural artists to see if anyone has achieved Chinese brush painting on top of an oil painting.

– Research further how Fiona Rae achieved her Chinese style brush strokes with oil paint on traditional canvas.

– Using the same oil painting here, sand an area and then apply further layers of gesso, then sand again if needed, to see if that would create a smooth enough surface without damaging the original image too much thereby achieving the desired results.

MA YI U1: Exploring media – Oil and cold wax – Part 1

Background

I have been wanting to experiment with oil and cold wax in abstraction because I find myself often drawn to other abstract artists’ work using these specific media. For example, a local artist from Bristol called Julia Maleeva. Below are examples of her work.

Julia Maleeva – Belfry 100x150cm. Oil and cold wax on canvas:

Julia Maleeva – Lemon shadow in love 100x150cm. Oil and cold wax on canvas:

METHOD

The objective of this exercise was just to experiment and try out how the oil and cold wax work together, applied using palette knives. I also wanted to add elements of collage to give additional texture.

Oil paint and cold wax mixed in 50/50 ratio, with a twisted paper strip to see if the paper would stick or if adhesive would be required:

More strips of paper was added:

More experimentation in different areas:

Each area explained (background is oil and cold wax mixed):

1 and 2: colour blocks of oil and cold wax mixed in 50/50 ratio.

3: pure oil paint was added to see how it appears on top of oil and wax background.

4: Blue area was oil, cold wax and solvent mixed to a thin and runny viscosity.

5: A twisted strip of paper stuck on the paint without requiring adhesive.

6: Strips of origami paper stuck on without adhesive.

7: Paper strips stuck on/half buried without adhesive.

I tried doing some Chinese style painting using oil paint as a top layer.

REFLECTIONS

I was pleased with the experiment of oil and cold wax. I felt at ease working with the medium and it was a pleasure applying it onto canvas. I noticed the colours remained true but the wax did make the paint more matt. The solvent worked well to thin the viscosity and I can imagine using this mixture if I wanted the paint to run down the canvas with a dripping effect.

The paper collage stuck well to the medium although I expect additional adhesive would be required for larger pieces.

I was not happy with the Chinese painting using oil paint. I couldn’t use ink on top of oil as the ink would pool rather than be absorbed. Hence I used oil and the finesse of the typical Chinese brush painting was completely lost and the depiction was poor. So this is an area that needs further investigation to achieve the desired effect if I wanted a Chinese style painting as the top layer on top of oil in my multimedia layering work.

In addition to trying out cold wax as a medium, I wanted to return to exploring abstraction as a way to be more expressive in my work. In exploring my style through multimedia layering, I find myself often being drawn into being too illustrative or repetitive in my expression and I wanted to investigate my deeper thoughts through abstraction and this is the first experiment in this series.

LEARNING

This initial experiment with oil and cold wax was positive and it is a medium that I want to explore further in addition to just using oil. The cold wax would enable me to give more texture and structure to my painting. Also it would allow me to scratch through the paint/wax as an effective way of mark making. Adding paper strips could add interest but I would use that only on a small scale; I can imagine it coming loose in the long term if larger pieces of collage were used in this way.

I am still searching for the ideal way to paint a Chinese style painting on top of oil to help me to express the transcultural nature of my style – the challenge is to find a medium that delivers the finesse whilst being compatible materially with my preferred western medium such as oil. I will revisit research that I have previously done on an artist who has successfully achieved similar to the style that I am looking for – Fiona Rae. She was able to achieve Chinese style brush strokes using oil.

NEXT STEPS

– Continue to explore oil and cold wax and do another painting to build experience in this style of abstraction.

– Research further into Fiona Rae’s work and see how she achieved her Chinese style brush strokes using oil.

– Keep experimenting with oil and cold wax.

– Keep searching for ways to paint with Chinese ink on oil paint.

MA Y1 U1: Research – Investigation of techniques for digital printing on canvas

Background

In my style development work, I developed a transcultural layering process where I combined multiple layers of images (both found and painted) that are relevant to my lived experiences to form an overall painting. Thus far, my process has been:

1. Creating digital collages of found images (manipulated and processed using Adobe Express).

2. Inkjet printing the digital collage onto paper (A1 size used so far).

3. Using dispersion liquid to transfer from the printed A1 poster onto a fabric canvas (I have experimented with satin and woven cotton canvas).

4. Painting on top of the imprinted fabric canvas.

All the layered images, printed or painted, are related to my lived experience as a transcultural person. Hence I called this part of my practice Transcultural Layering.

The process described here has been developed in my home studio where the facilities are limited. Hence dispersion liquid is used because it is a process that I can manage myself. The disadvantage of using dispersion liquid is that it changes the material canvas, creating a layer like dried PVA glue. This is useable with the more robust paint media such as acrylic or oil. However, for more delicate media such as Chinese ink brush painting on satin, the lack of absorbency of the glue-like canvas means the brush strokes do not work as intended. To overcome this, I had to do the Chinese brush painting first then transfer the image onto the reverse side of the satin canvas. This makes the process unnecessarily complicated and I was unable to fulfil my desire to paint the top layer in response to the printed base image.

Project description

I want to investigate what facilities are available at CSM to solve my challenge of digital printing on canvas. Once I have established what’s available, I will visit campus to do some experiments and assess the outcomes to build a catalogue of processes, techniques and materials that I can choose from for future work.

Part 1 – Investigate digital printing facilities at CSM

Experiencing – What I did

To solve my challenge to print on canvas, I want to make use of the facilities and expertise available at CSM to help me explore better ways to do the digital image transfer onto canvas. Also to explore other canvas materials. To this end, I emailed the digital printing lab to ask what facilities are available that are accessible for me and I was absolutely delighted to receive the following info.

“We have a UV printer that can print onto pretty much anything including fabric, max printable area is 77x33cm. You could tile an image onto a larger piece of fabric if you are not worried about the alignment of the tiles being perfect, ie an overlap or gap.

We also have a large format solvent printer that can print onto canvas up to about 450gsm. We stock a polycotton canvas (printable widths of 1.3m and .85m) and people have printed on their own coated and uncoated canvas. With uncoated canvas the ink tends to bleed into the fabric giving a blurred image.
Both of the above use solvent inks that have a sheen to them in dark colours they are not a matt finish.

We also have an archival inkjet canvas printable width 1.1m, matt finish.
All of them should be ok with acrylic or oil paint, ink might only work on the inkjet.”

Further info pricing, file formats etc can be accessed from the moodle link below

Course: CSM Technical Moodle, Section: Digital Print (arts.ac.uk)

Digital Print Location: B301

Opening hours

  • Digital Print
    Mon to Thurs: 10:30 – 12:30 | 14:00 – 17:00 Fri: 10:30 – 13:00
  • Riso
    Tue & Thu: 10:30 – 12:30 only

Reflecting – How I feel

I am so thrilled! The reply was beyond my expectation. Not only is my challenge solved, I have many options to choose from! The experience also reassured me of how easy it is to ask for help at CSM – this is important for me because I am new to the university and am still trying to find my way around. I have since researched into other facilities at CSM and I want to make the most of my access to them for my practice.

Thinking – What I learned

Be optimistic, the outcome is often better than expected and never hesitate to ask.

Also, I feel very privileged to have access to all the facilities and I am keen to not waste the opportunities like I would have done in my younger student days!

Acting – What to do next

In order to build a catalogue of canvas printing options, I will do one or more prints from each of the different printers and then assess the outcomes to determine their suitability for the kind of work that I make.

As for making use of the other facilities, I don’t have a plan yet but will open my mind when planning my work to include the facilities available in my thinking.

Part 2 – Printing experiments at CSM

Plan – Print trials to do

Obtain prices then arrange for the following prints:

1. UV Printer (max size 77x33cm)

– 1 x A3 cotton canvas

– 1 x A3 silk canvas

2. Large format solvent printer

– 1 x A3 cotton canvas

– 1 x A3 silk canvas

3. Inkjet printer

– 1 x A3 cotton canvas

– 1 x A3 silk canvas

All printers and canvases to print the same image in order to compare the outcomes.

I have decided to research and compile a new image of digital collage. I will use Adobe Express for this work.